Route requests across providers
The foundational developer walkthrough: create an API key, attach policies that reach more than one backend, send a request, and verify it in Request Logs. The more specific routing patterns (fallback chains, traffic splitting, advanced rules, and Bring Your Own Key) are incremental additions on top of this same setup.
Persona: Developer working in the Developer Console.
Estimated time: 15 to 20 minutes for the first run, including time to copy values between the Console and a terminal.
Outcomes
By the end of this guide:
- A working API key exists in the Console, stored securely outside of Agent Router.
- Fallback or traffic-splitting policies are attached to that key, referencing at least one, and ideally two, enabled models.
- A request sent through the gateway returns a successful response from one of the configured backends.
- The request is visible in Request Logs, with the resolved model, latency, token counts, and cost recorded.
Prerequisites
This guide assumes that a platform operator has already provisioned the models and providers that requests are routed to. The operator-facing companion to this work (enabling models, configuring providers, and verifying provider connectivity) is covered by Provision models and providers. If models are not yet enabled in the Admin Console, that step has to happen first; the Console can only build key policies on top of what Agent Router has been told to expose.
Before starting:
- The Admin Console shows at least one enabled model with a healthy provider connection.
- Developer access to the Console is in place.
- A terminal with
curl(or a Python environment with theopenaipackage) is available for the request step.
The Console and the proxy endpoint
The Developer Console is the developer-facing application within Agent Router. It provides a single interface for routing requests across the supported models, managing API keys, and monitoring usage and costs. Access is through a deployment-specific URL, and sign-in is by corporate SSO.
After sign-in, the landing page is the Dashboard. It surfaces the proxy endpoint, recent request activity, and shortcuts to common actions:
- The proxy endpoint is displayed at the top of the Dashboard and on the API Keys page, and again after a key or one of its policies is created. It is the OpenAI- and Anthropic-compatible base URL that requests are sent to. The value includes the scheme and ends in
/v1, so it is thebase_urlin a client configuration without modification. Any tool, SDK, or HTTP client that speaks the OpenAI Chat Completions or Anthropic Messages API can connect to it, authenticating with an API key passed in theAuthorization: Bearerheader. The copy icon next to the URL copies it to the clipboard. - Summary metrics cover the selected period: Total Requests across all keys, and Total Spend (shown only when billing is enabled). A time-range selector (last 24 hours, last 7 days, or last 30 days) adjusts the window.
- An API key summary card per key shows recent activity at a glance.
- Quick actions jump directly to API key creation or to the Playground.
The concepts that recur throughout this guide are summarized below:
| Concept | Description |
|---|---|
| Proxy endpoint | The OpenAI- and Anthropic-compatible URL that routes requests to the correct provider. |
| API key | The credential an application presents to the gateway, associated with a Console user and its policies. |
| Key policies | Fallback and traffic-splitting settings attached to one API key. |
| MCP profile | A named collection of Model Context Protocol (MCP) servers exposed through a single Agent Router URL. |
Proxy endpoint is the label the Console displays, and it is the term used here when referring to what appears on screen. Gateway URL refers to the same value where the product surface is not the Console, for example in installation and operator documentation. Both name one URL. Data plane is reserved for the deployment that hosts gateways, never for the URL itself.
Step 1: create an API key in the Console
API keys are the credential applications present when they call the gateway. Each key carries its own policies, so creating the key comes first; the routing rules are attached to it in the next step.
- Sign in to the Console.
- Open Settings → API Keys from the sidebar.
- Click Create API Key.
- Enter a descriptive name. Names are surfaced in Request Logs and usage analytics, so a phrase tied to the calling application or environment (
checkout-service-prod,rag-experiment-staging) is more useful at audit time than a generic value. - Click Create and copy the generated key immediately. Keys are prefixed with
sk-(for example,sk-abc123def456...).
The full key string is displayed only once. It cannot be retrieved later from the Console; if it is lost, the key has to be revoked and a new one issued. Store it in a secrets manager, an environment variable, or whatever credential store the application stack already uses, not in source control.
What the API Keys page shows
Once created, each key is listed on the API Keys page with its own usage statistics, so cost and volume can be tracked per integration, environment, or team member:
| Column | Detail |
|---|---|
| Name | The descriptive label entered at creation; also surfaced in Request Logs and usage analytics. |
| Total requests | The number of requests made with the key. |
| Token counts | Input and output tokens consumed by the key. |
| Total spend | The accumulated cost attributed to the key. |
| Actions | Configure routing, set rate limits, or revoke the key. Revocation is immediate, and any further requests with the key return an authentication error. |
Each key can also carry a per-hour rate limit. Rate limits are configured per key from the key's Configure action: the Rate Limit section is enabled with a toggle, after which three independent token-budget sliders become available. Each can be enabled separately and set with the slider or by typing a value:
- Total tokens: maximum combined input and output tokens per hour.
- Input tokens: maximum prompt tokens per hour.
- Output tokens: maximum completion tokens per hour.
Limits are evaluated on a rolling one-hour window that counts the current request together with all tokens consumed by the key in the preceding hour. Only enabled limits are enforced, and each is checked independently; a request is rejected if it would exceed any active limit. Requests that exceed a limit receive a 429 Too Many Requests response.
Revoke a key
A key is revoked from its row on the API Keys page using the revoke action; the action requires confirmation. Revocation is immediate: in-flight and future requests presenting the revoked key return an authentication error. A revoked key cannot be restored; a replacement key has to be issued.
Key hygiene
- Descriptive names: name keys after their purpose (
ci-pipeline,staging-app,john-local) so usage can be identified later. - One key per integration: a separate key per application, environment, or developer keeps usage tracking isolated.
- Rotate regularly: keys are periodically revoked and replaced, especially for production systems.
- Never commit keys to source control: environment variables or a secrets manager are used instead.
Step 2: configure routing across providers
Routing rules are attached to individual API keys: the same Console account can hold one key with a single-backend configuration and another key with a multi-backend chain, and the choice between them is made by which key the calling application presents. This per-key separation is useful for keeping experimental routing arrangements off the path of production traffic.
-
From the API Keys page, click Configure on the row for the key that was just created.
-
Expand the section for the strategy required. For a first pass, Manual Availability Fallback is the simplest choice, because it works equivalently with one backend or several:
Section Behavior Automatic Availability Fallback Fallback with no configuration of its own, currently covering Anthropic models. Manual Availability Fallback Backends are tried in order; the gateway walks to the next backend only when the previous one fails. Traffic Splitting Backends share traffic by weight, on every request. Useful for evaluation and cost management. -
Add the primary model as the first backend. It takes the Primary badge in a fallback policy and in a traffic split alike. The model picker draws from the Model Catalog (Catalog → Model Catalog), which lists every enabled model with the detail needed to choose one:
Column Detail Model name The identifier used in API requests (for example, gpt-4o,claude-sonnet-4-20250514).Provider The upstream provider hosting the model. Context window The maximum number of tokens the model accepts in a single request. Pricing Cost per input token and per output token. Status Whether the model is enabled or disabled for the organization. The catalog spans 200+ models from providers including OpenAI, Anthropic, Google, Azure, Mistral, Cohere, Together, and Perplexity, sorted newest first by default. A search bar filters by name in real time, and the list can be narrowed by one or more providers and by status (enabled or disabled). A Group Snapshots toggle collapses dated model versions under their parent model for a cleaner view, or expands them to show every individual version. Selecting a model opens a detail page with its full name and provider, context window (input and output limits), pricing per million input and output tokens, supported capabilities (chat completions, function calling, vision, and others), and current status.
-
Optionally add a second backend from a different provider, for example, a Claude model behind a GPT model, or vice versa. This is what turns the configuration from "send everything to one provider" into "route across providers". Even with only one backend configured, the surrounding mechanics are identical; adding a second one later does not require any application change.
-
Save the configuration.
-
Confirm that the Enable toggle on the section just configured is on. Each section on the key's page, Automatic Availability Fallback, Manual Availability Fallback, and Traffic Splitting, carries its own toggle and is enabled independently of the others. A section that is switched off is saved but not enforced; requests bypass it and go directly to whatever model the calling code specifies.
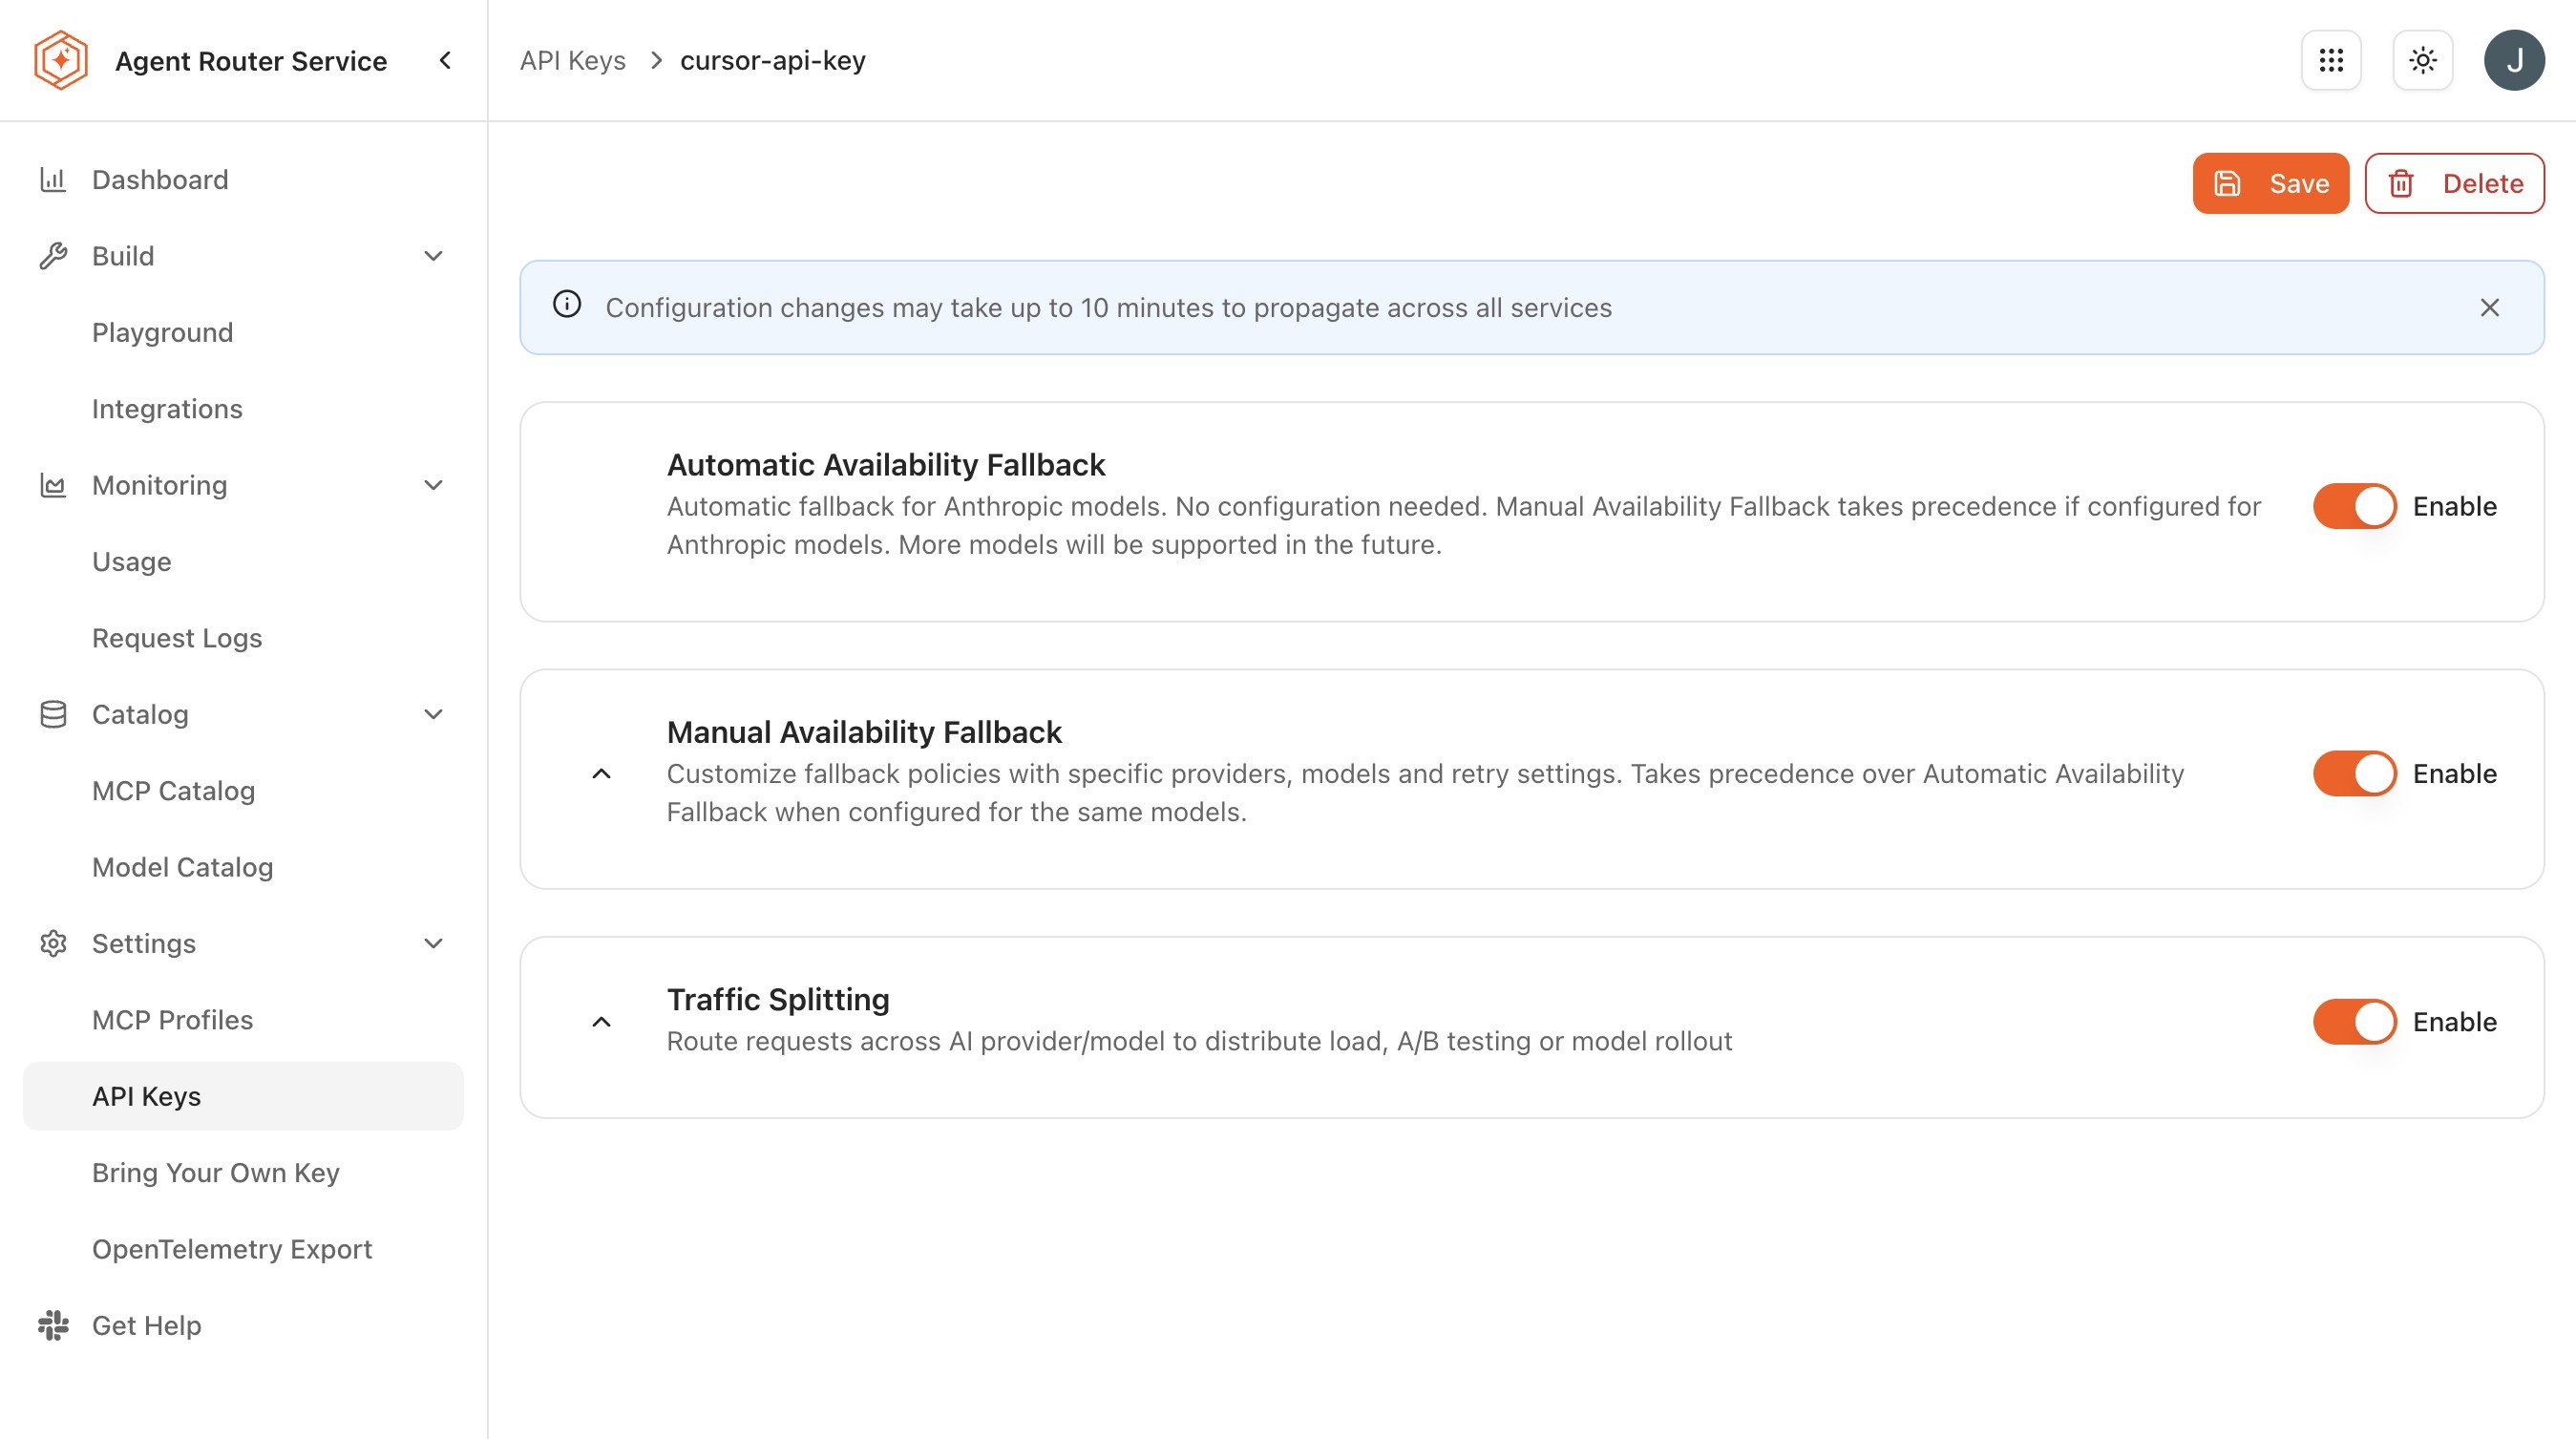
Saved changes reach the gateway in under a minute; the Console carries the same reminder on the page.
Per-key policy reference
A few constraints apply to every key policy, regardless of strategy:
- Per-key scope: Rules are attached to one API key. A test key can run an experimental configuration while a production key holds a stable one.
- Enable toggle: Each section carries its own toggle, so fallback and traffic splitting are enabled independently. A section that is switched off is retained but not enforced; switching it back on restores its rules without reconfiguring them.
- Model availability: Every model referenced in a rule must be enabled in the model catalog. If a model is later disabled by an administrator, rules that reference it may stop behaving as expected.
The Console's defaults, with the first model in a section taking the Primary badge, are the right starting point for the cases covered in this guide. The deeper mechanics of each strategy (chain ordering, weight tuning, and attribute-based dispatch) are covered in Improve resilience with fallbacks, Reduce cost with traffic splitting, and Apply advanced routing rules.
Step 3: send a request through the gateway
The gateway exposes an OpenAI-compatible endpoint at /v1/chat/completions. The request shape is the standard OpenAI Chat Completions payload, and the API key from Step 1 is presented as a bearer token. The same endpoint serves every backend Agent Router supports, regardless of which underlying provider ultimately handles the request.
The proxy endpoint is specific to the deployment and is copied from the Console Dashboard or the API Keys page, as described above. In the examples below, PROXY_URL stands for that value, scheme included and ending in /v1, and YOUR_API_KEY for the key copied in Step 1.
Using curl
curl PROXY_URL/chat/completions \
  -H "Authorization: Bearer YOUR_API_KEY" \
  -H "Content-Type: application/json" \
  -d '{
    "model": "gpt-4o",
    "messages": [{"role": "user", "content": "Explain the concept of AI routing in one sentence."}]
  }'
Using Python
from openai import OpenAI

client = OpenAI(
    base_url="PROXY_URL",
    api_key="YOUR_API_KEY",
)

response = client.chat.completions.create(
    model="gpt-4o",
    messages=[{"role": "user", "content": "Explain the concept of AI routing in one sentence."}],
)

print(response.choices[0].message.content)
A successful call returns a response in the same shape the calling code would expect from OpenAI directly; which model actually produced the response is determined by the key's policies, not by the value of the model field.
The model field in the request is treated as a hint rather than a strict instruction once routing rules are in place. If the configured routing strategy resolves to a different backend (for example, a fallback chain has fallen through to its secondary model), the gateway uses that backend regardless of what the application sent. The exact resolution rules are documented in Gateway behavior.
Step 4: verify the route in Request Logs
Sending a request is not the same as confirming the routing behaved as expected. Request Logs is the developer-facing record of every request that flowed through the gateway under a given API key, with enough detail to settle questions about which backend served the request and how it performed.
-
In the Console, open Monitoring → Request Logs.
-
Locate the test request, the most recent entry under the API key created in Step 1.
-
Expand the row to view the detail panel.
-
Confirm the following fields are populated and consistent with the key's policies:
Field What to check Resolved model Matches the backend the gateway actually used, not necessarily the value sent in the modelfield.Provider Matches the upstream provider for the resolved model. Token counts Input and output tokens are present and non-zero. Latency The end-to-end time the gateway observed for the call. Cost The computed cost based on the resolved model and token usage.
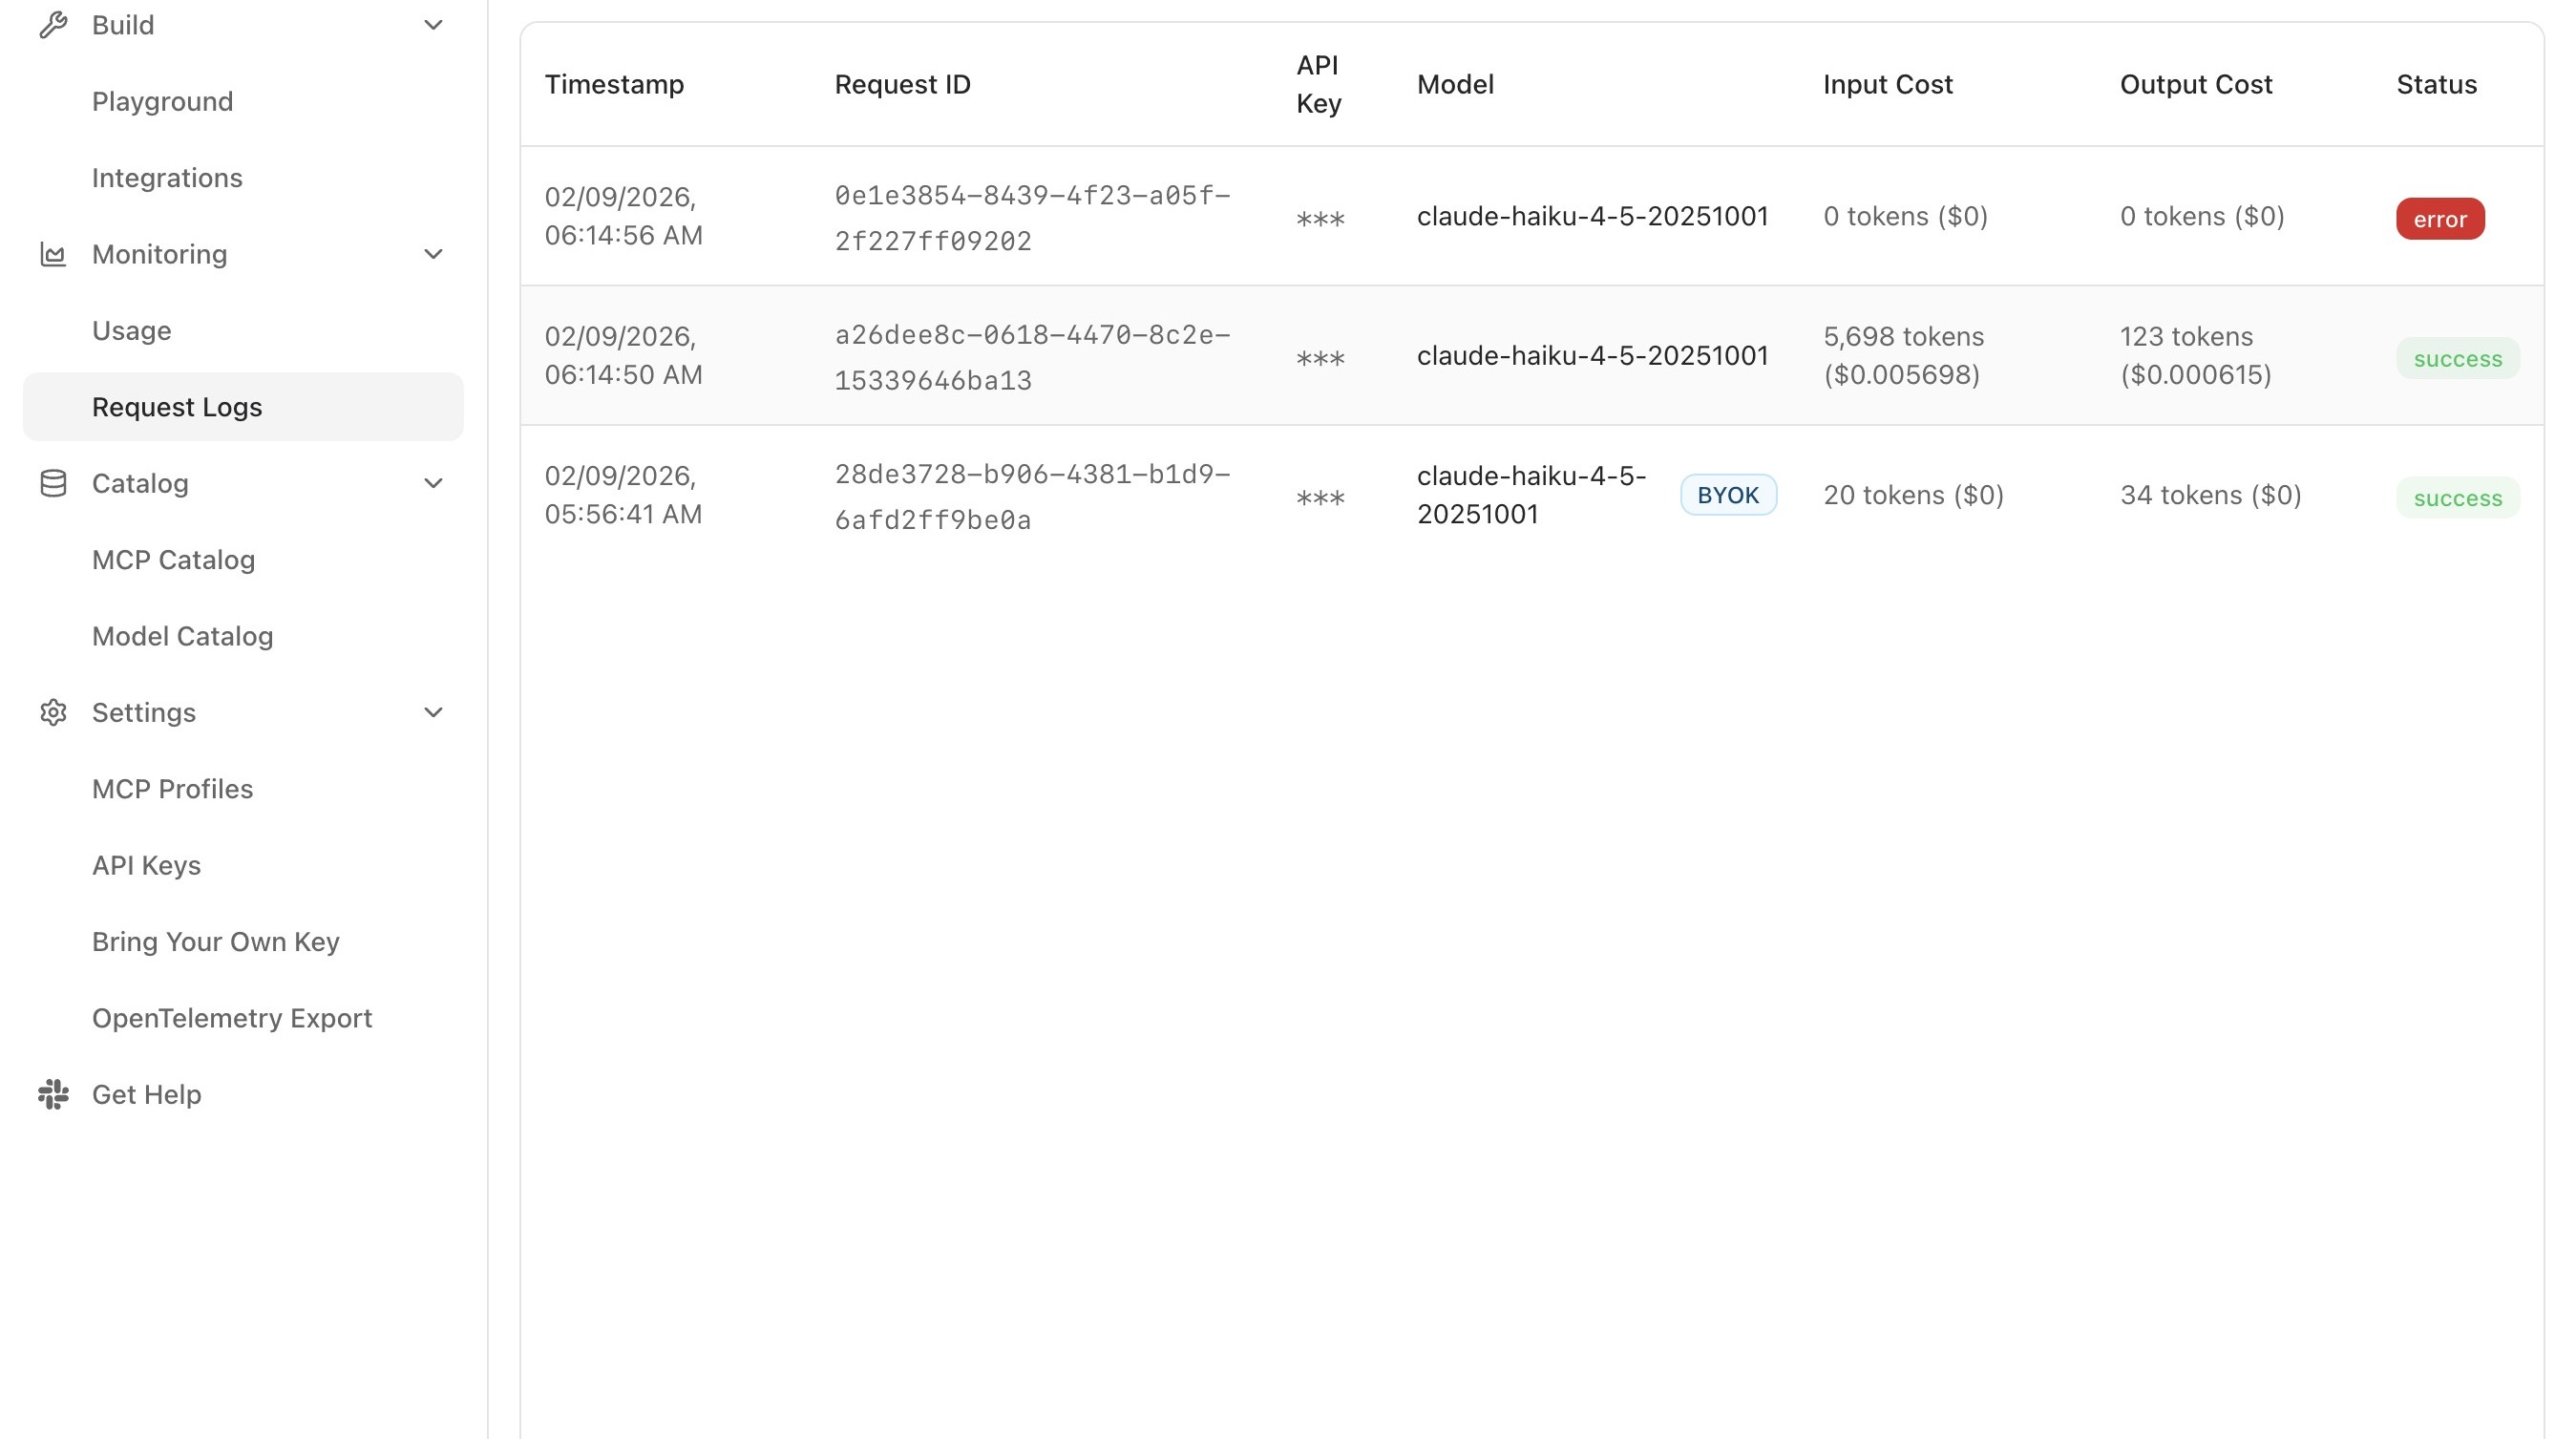
If the resolved model differs from the primary backend in the fallback policy, the chain has fallen through, either because the primary backend returned an error or because the configured strategy distributes traffic by weight. Both are expected behaviors; the deeper failure-mode handling is covered in Improve resilience with fallbacks.
Request Logs can be filtered by API key, time range, model, or response status, and each row expands to a detail panel showing the full request and response content. The aggregated view (spend and volume broken down by model, provider, and key) is covered in Monitor traffic and usage.
Where to go next
The foundational route is in place. Each guide below adds one behavior on top of it, without reworking what has already been built.
Improve resilience with fallbacks
Formalize the multi-provider chain into an explicit ordered fallback policy.
Reduce cost with traffic splitting
Distribute requests by weight rather than by priority.
Apply advanced routing rules
Dispatch requests based on attributes of the request itself.
Use your own provider credentials
Introduce Bring Your Own Key (BYOK) credentials into the routing chain.
Monitor traffic and usage
Expand on Step 4 with usage analytics and cost reporting across API keys.