Onboard developers and issue keys
Once models and providers are provisioned, the next operator task is to make Agent Router reachable to the people who will actually consume it. In small deployments this is a manageable thing to do one user at a time; in larger ones, it becomes the recurring background work of running Agent Router: new joiners, leavers, role changes, and the occasional emergency revocation. The Admin Console makes both ends of that spectrum tractable through two surfaces: Users, an organization-wide view of registered accounts and their roles, and API Keys, an organization-wide view of every API key regardless of which user issued it.
Persona: Platform operator working in the Admin Console, with occasional excursions into the Console.
Estimated time: 10 to 20 minutes for a single onboarding pass; ongoing thereafter.
When this guide applies
| Situation | What it covers |
|---|---|
| A new developer or team needs platform access | User registration confirmation, access grants, and an initial API key |
| A developer has changed role and now needs admin access (or has lost it) | Role assignment through Directory → Access |
| An API key has been leaked or is suspected to be compromised | Immediate organization-wide revocation through the Admin API Keys surface |
| Periodic security hygiene, identifying keys that have not been used in months | The Last Used filter and organization-wide sort on the API Keys surface |
| A leaver needs to have every credential they hold removed | The combination of user-level audit and per-user API key filter |
For self-service key creation by individual developers, the most common day-to-day onboarding pattern once an account exists, the Console's own API Keys page is the right surface, and developers manage it themselves. The administrative side of that same activity is what follows.
Outcomes
By the end of this guide:
- The Users surface has been opened, exercised, and at least one user's current role has been reviewed.
- The organization-wide API Keys view has been used to locate keys by owner and status.
- The mechanics of revocation are understood, including what changes from the developer's perspective when their key stops authenticating.
- The relationship between SSO-driven role mapping and manual role edits is clear, so the two are not used in conflict.
Prerequisites
- Administrator access to the Admin Console, typically the
super_adminoruser_adminrole. - For SSO-managed deployments, the SSO and role-mapping configuration is already in place. See Configure SSO and the SSO role mapping guide for the foundational setup. On Auth0 evaluation tenants, create accounts in Auth0 first; users appear in Agent Router after their first SSO sign-in (see Team prep).
- For non-SSO deployments, an out-of-band registration channel exists so that new users can land in Agent Router's user table in the first place.
Step 1: confirm the user is registered
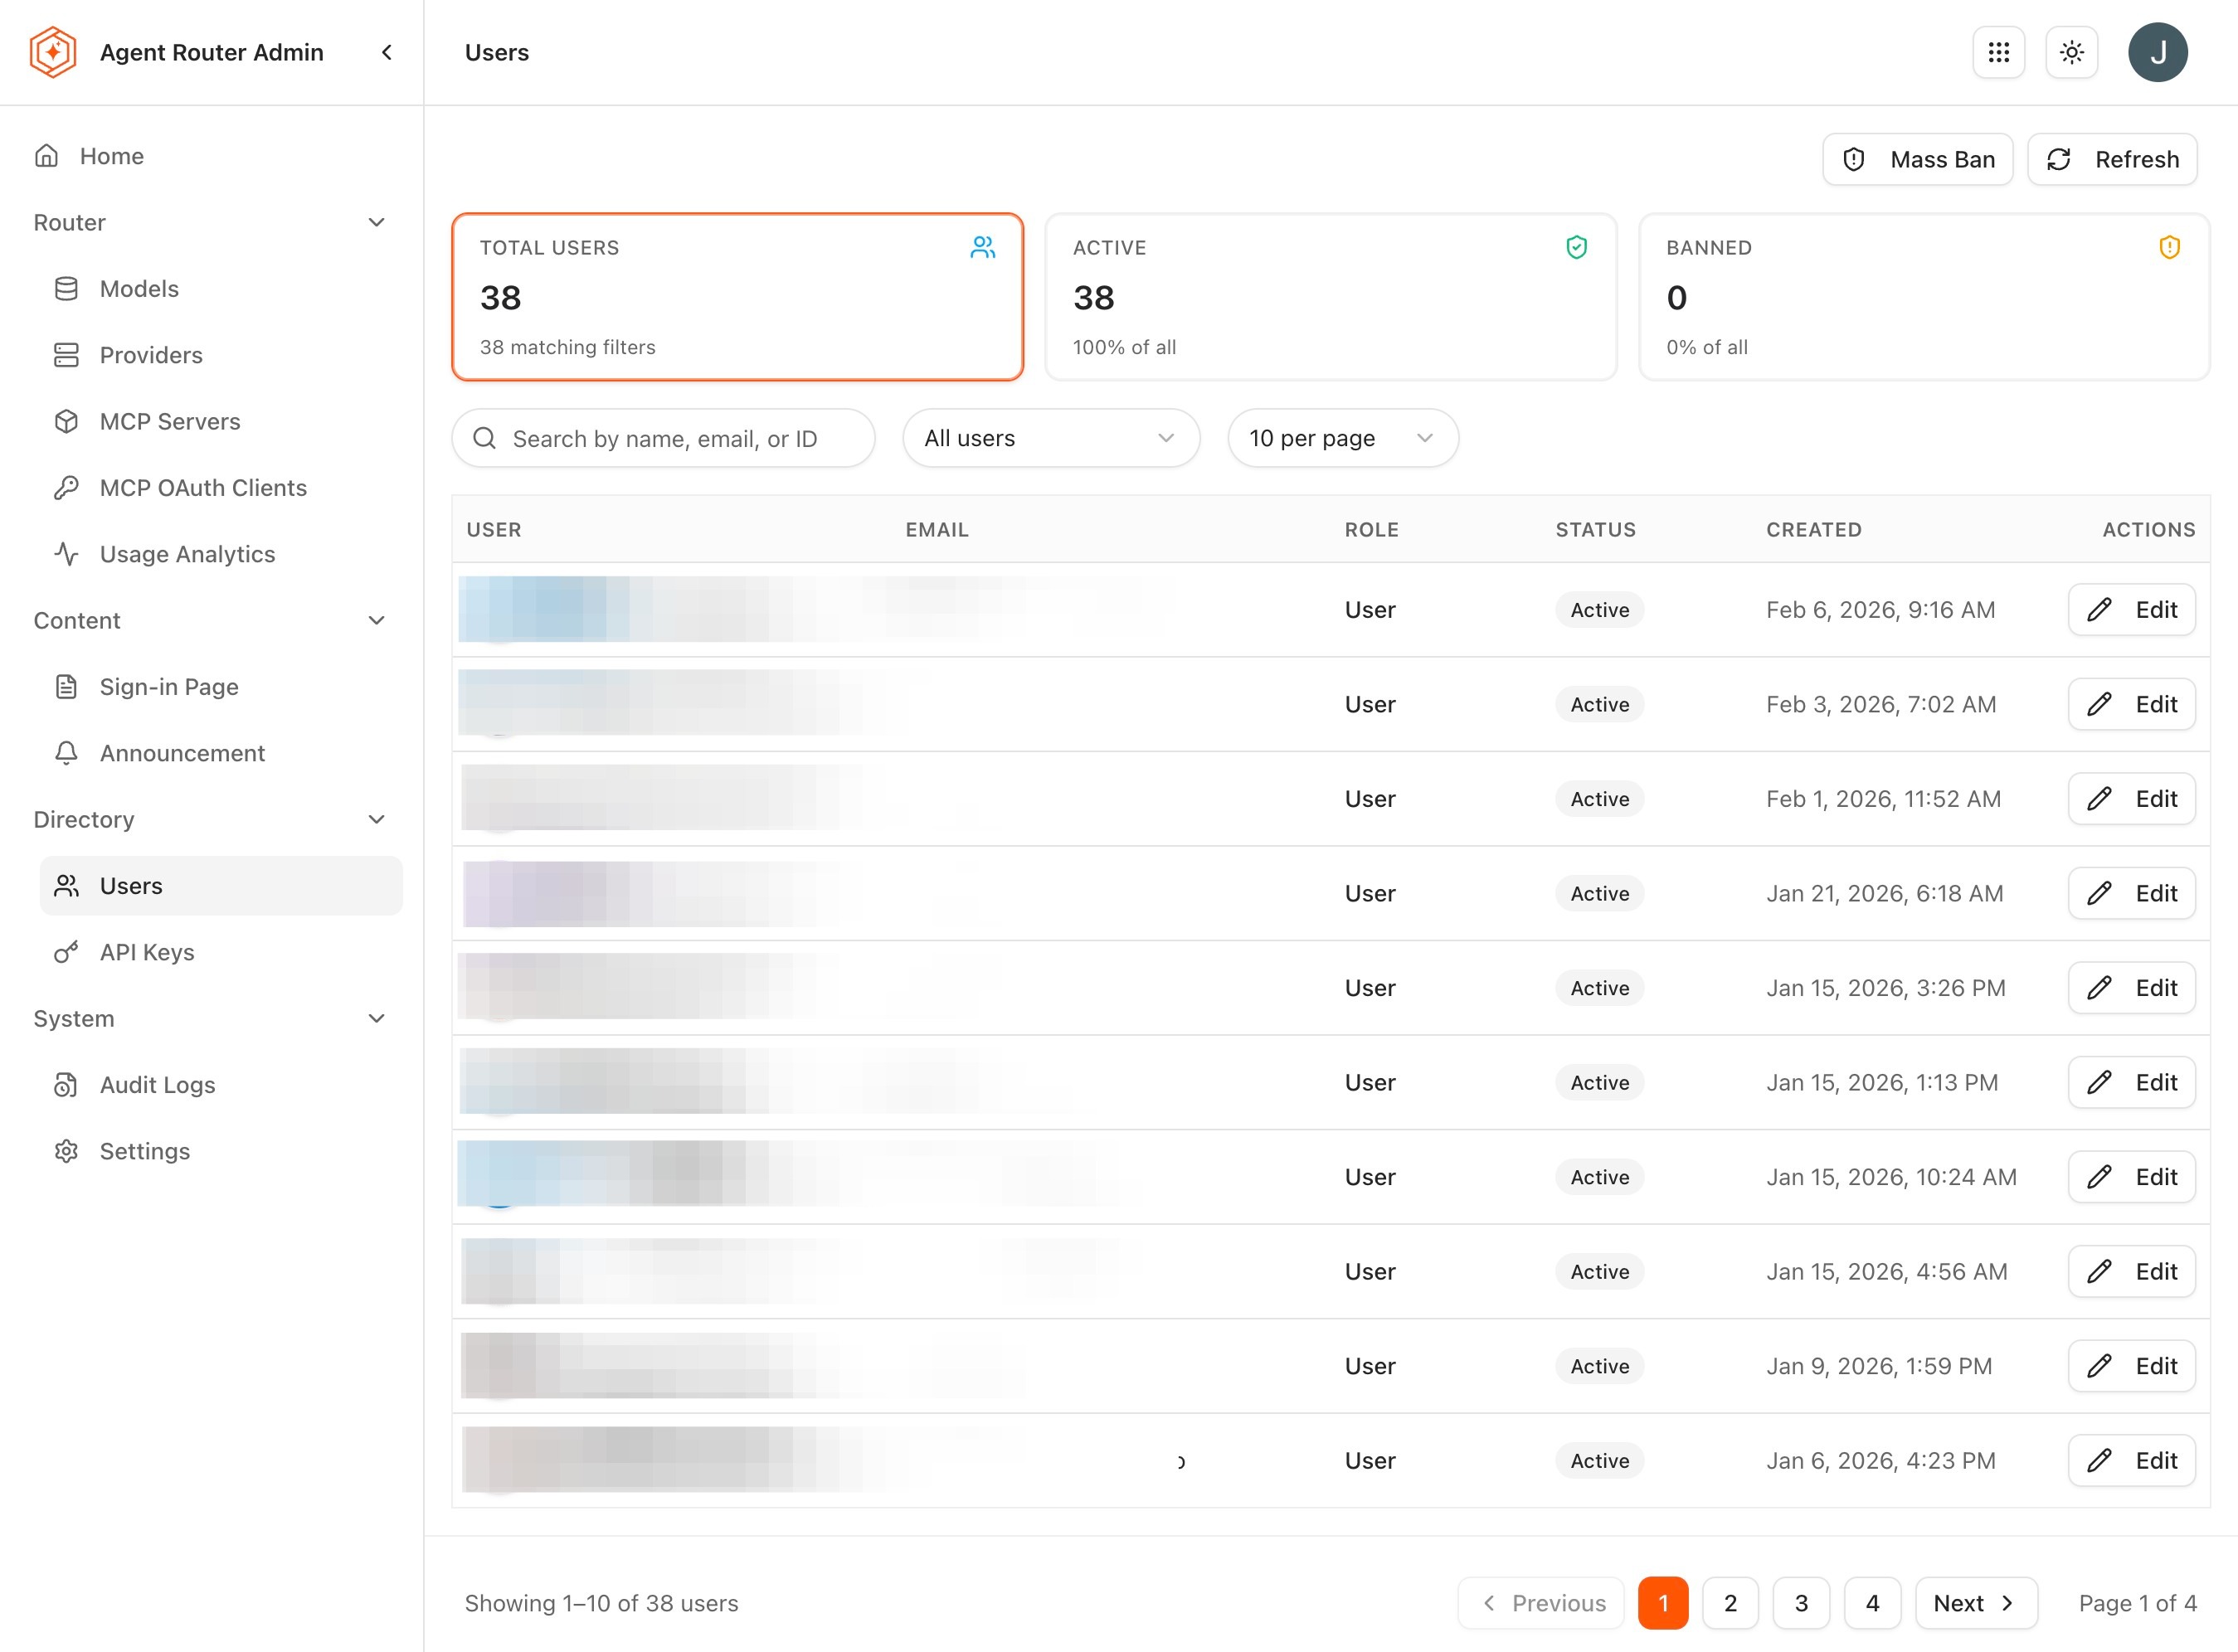
The Users surface is the operator-side ledger of who exists in Agent Router. Every account that has ever signed in through SSO, or been provisioned through whichever mechanism the deployment uses, appears here.
-
Sign in to the Admin Console.
-
Open Users from the sidebar.
-
Review the columns surfaced for each user:
Column What it captures Name The user's display name Email The user's email address Role The user's currently assigned Agent Router role Organization Unit The organizational group, when configured Last Sign-In The timestamp of the user's most recent authentication Status Active or Inactive -
Use the search box to find the new user by name or email. The role and status filters narrow the list when the user base has grown large. Results update in real time as the query is typed or a filter is selected.
-
If the user is missing entirely, the cause is upstream: either the user has not yet signed in for the first time (no Agent Router record exists until first sign-in), or the SSO configuration is not yet exposing them to Agent Router. The fix is at the identity-provider level rather than in the Admin Console.
The user's first sign-in is what creates the record. Once present, the row is editable.
Clicking a user's row opens the detail view, which carries more than the list columns expose. The full profile adds the registration date alongside the name, email, role, organization unit, and last sign-in timestamp. An activity summary on the same view reports recent API key usage and request counts. A dedicated Activity tab lists the user's recent actions (API key creation, model usage, and request history), which is the most direct way to understand an individual user's consumption patterns before a role change or an offboarding.
Step 2: assign or verify access
The role determines what the user can see and do across Agent Router. The role model is intentionally small, so the assignment decision rarely takes long.
| Role | Permissions |
|---|---|
super_admin | Full platform administration: everything in the Admin Console |
model_admin | Manage model routes and backends |
provider_admin | Manage upstream AI providers |
mcp_admin | Manage MCP profiles and the MCP server catalog |
user_admin | Manage users and organization membership |
billing_admin | View and manage billing and usage |
user | Console access only; standard developer permissions |
The Users surface is the right place to confirm the role a person currently has. Use Directory → Access to grant, edit, or remove Admin Console access.
- Click the user's row to open the detail view.
- Review the Role field and the user's recent activity.
- If the person needs admin access, open Directory → Access.
- Select Grant access, choose the user, choose the role, set the scope, and confirm.
For the full grant, edit, and revoke flow, including the protected Super Admin role, see Manage roles and permissions.
The change takes effect on the user's next page load or next API request, depending on which surface they reach first.
For deployments that use SSO-driven role mapping, the role assigned by claim mapping wins on every login. Manual role edits to a user whose role is also managed by SSO mapping are not durable; the next login will overwrite the manual change to whatever the IdP claim resolves to. Manage those users' roles through the identity provider, not through the Admin Console. Manual edits are appropriate only for users who are not covered by the mapping. The precedence rules are documented in the SSO role mapping guide.
Step 3: understand how developers issue their own keys
Most API keys in Agent Router are created by developers themselves, in the Console, against their own user record. The operator-side surface watches and governs the resulting key set rather than driving its creation.
The developer-side flow, for context:
- The developer signs in to the Console.
- They go to Settings → API Keys.
- They click Create API Key and supply a descriptive name.
- The full key value is displayed once. The developer copies it into a secrets manager or environment variable.
- The key is presented at the gateway as a bearer token thereafter.
The naming convention developers adopt at this step matters operationally. An Agent Router deployment whose keys are named after their purpose (checkout-service-prod, rag-experiment-staging, cursor-local-john) is much easier to audit than an Agent Router deployment whose keys are named key1, key2, and test. Encouraging the convention through documentation and onboarding materials is more effective than enforcing it after the fact.
For the deeper developer-side reference, see Route Requests Across Providers.
Step 4: audit and revoke keys organization-wide
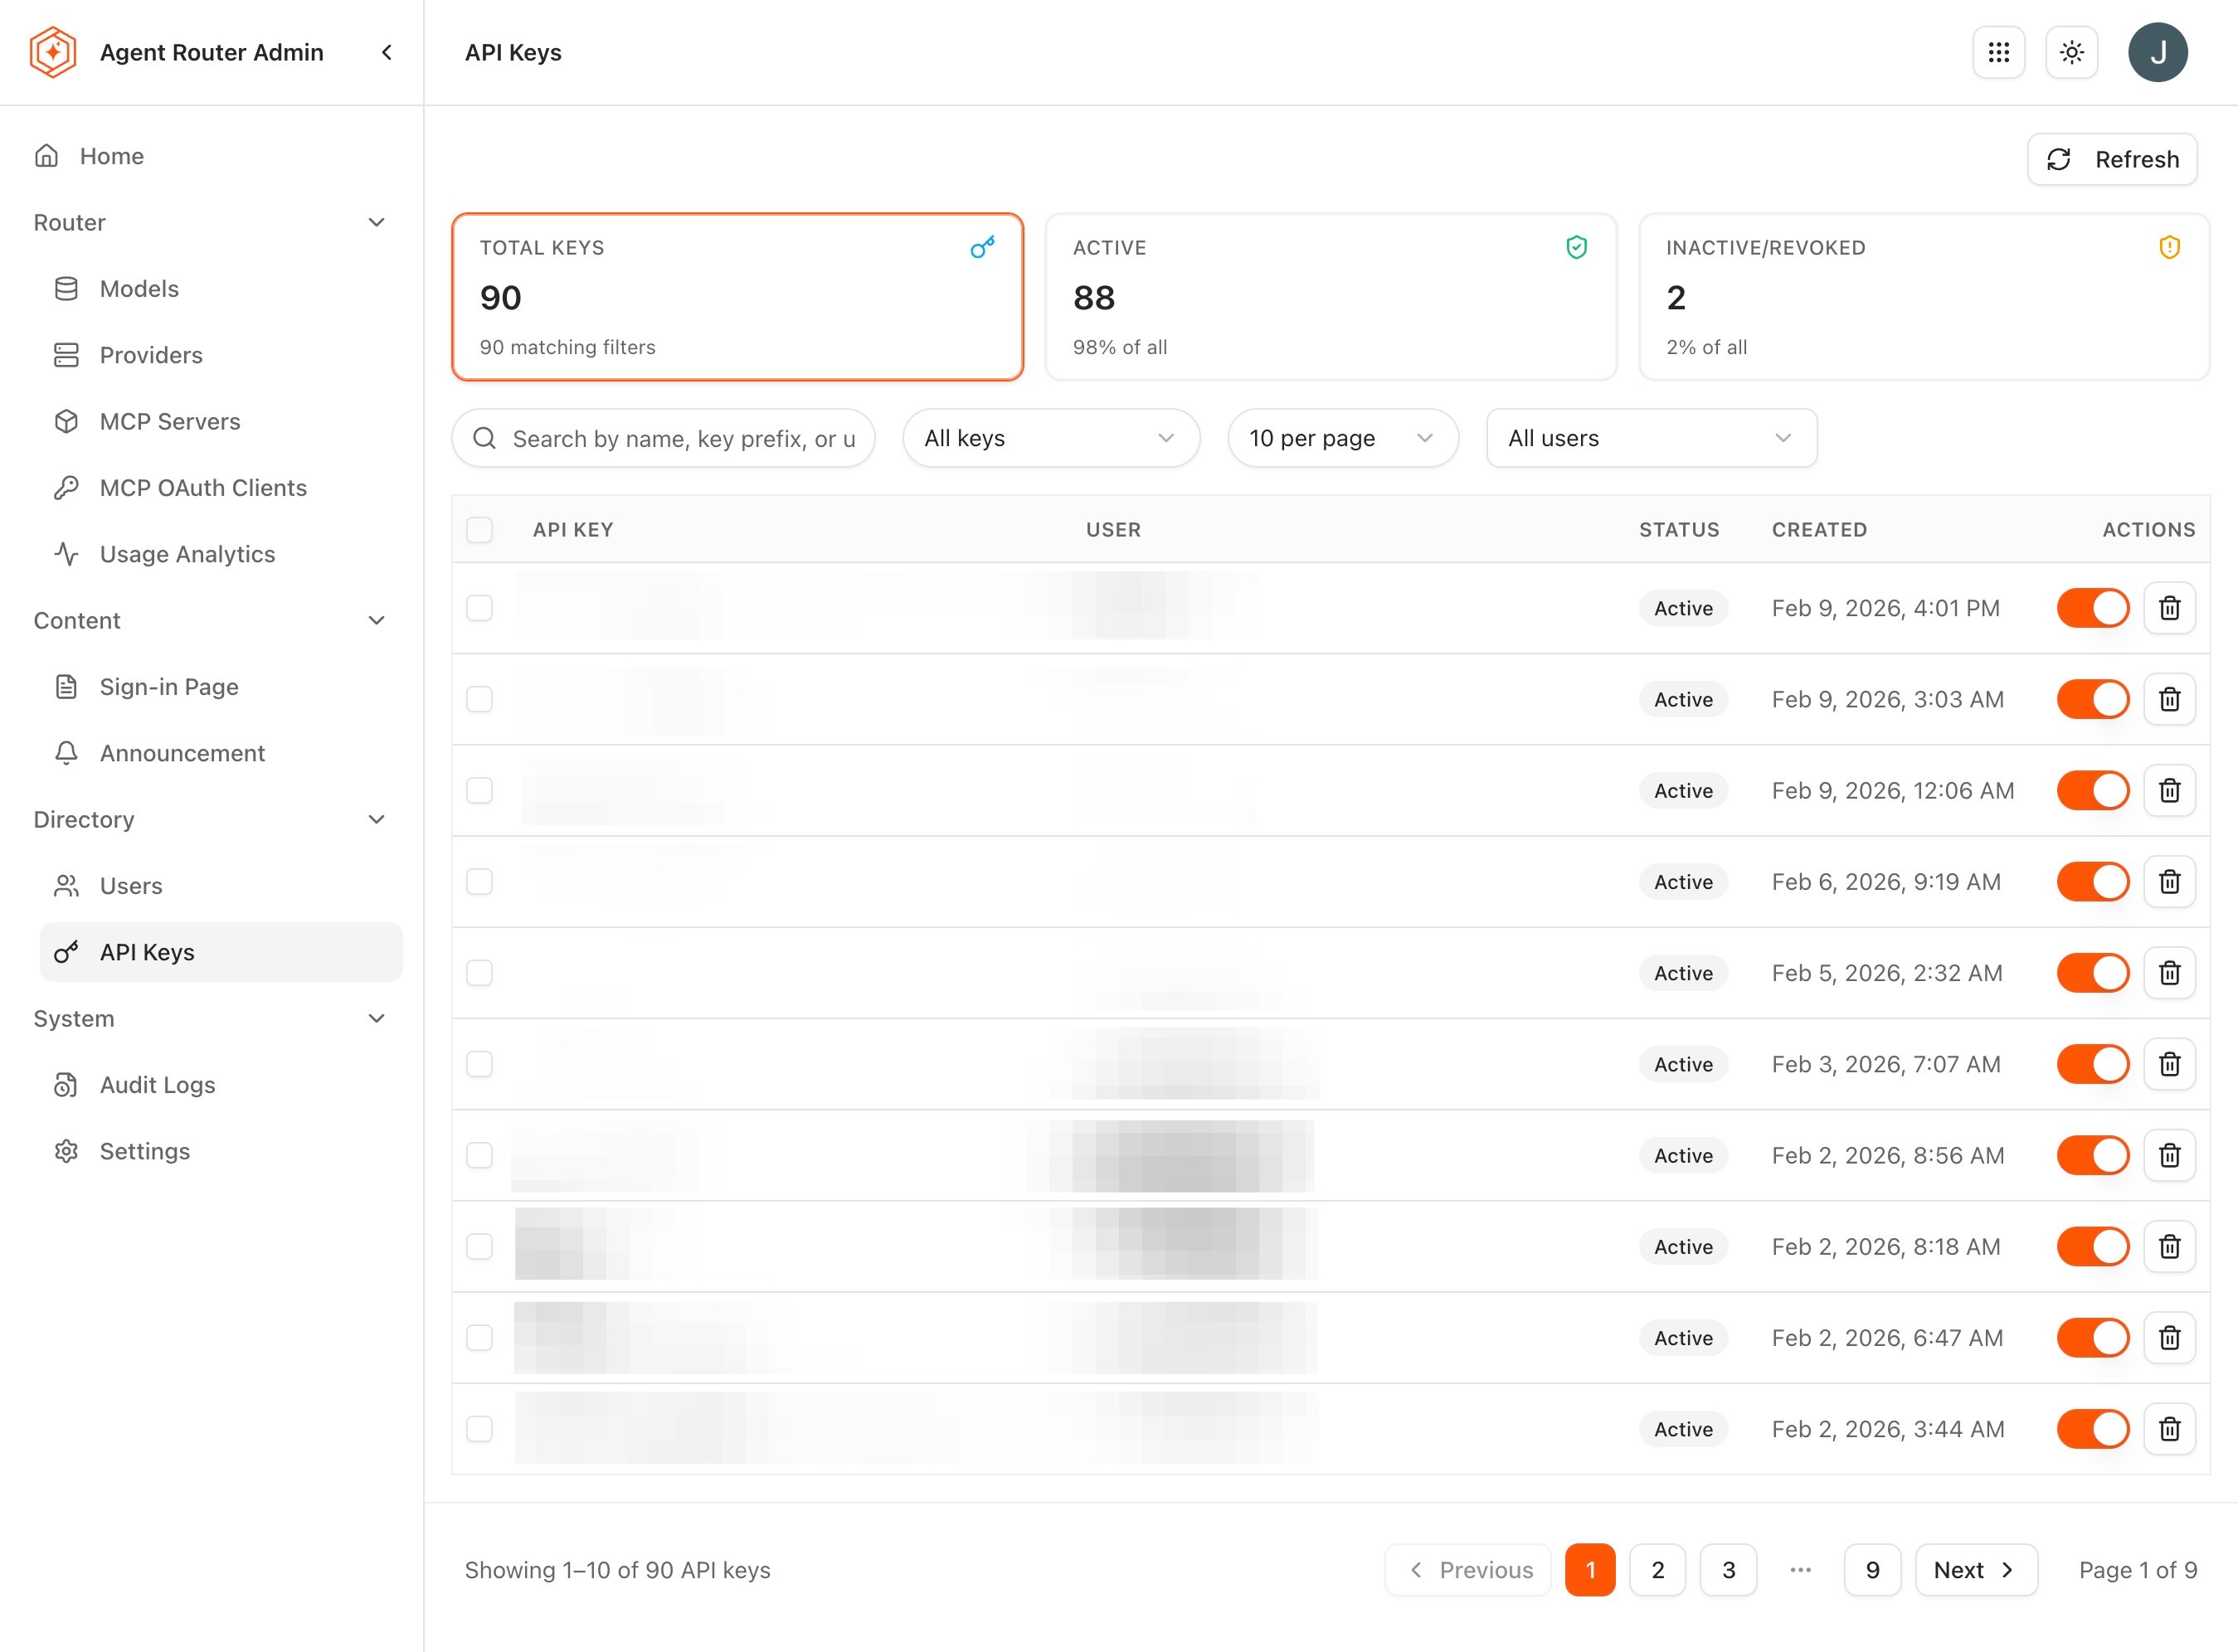
The Admin Console's API Keys page is the organization-wide view that the Console's per-user view does not provide. Every key in Agent Router appears here, regardless of which user issued it.
-
Open API Keys from the sidebar.
-
Review the columns surfaced for each key:
Column What it captures Key Name The descriptive name the developer chose Owner The user who created the key Key Prefix The first characters of the key (such as sk-...abc) for identificationCreated The creation date Last Used The timestamp of the most recent request authenticated by the key Status Active or Revoked -
Use the search box to find keys by name, owner, or key prefix, and the status and owner filters to narrow the list. Results update in real time as the query is typed or a filter is selected.
Clicking a key's row opens its detail view, which exposes the full metadata: name, owner, creation date, last used timestamp, status, and the policies associated with the key. The same view carries the key's usage history, which is the quickest way to confirm recent activity before deciding whether to revoke.
The distinction between the Admin and Console views is worth keeping clear:
| Feature | Admin API Keys | Console API Keys |
|---|---|---|
| Scope | All keys across all users | Only the signed-in user's keys |
| Ownership | Owner column visible | All keys belong to the current user |
| Actions | View and revoke any key | Create, configure, and revoke own keys |
| Audience | Agent Router administrators | Individual developers |
Both views list keys that authenticate inference traffic at the gateway. Keys for automating the platform itself are a different thing: they come from a different endpoint, and the gateway rejects them. Which API key for which surface puts the two side by side and gives the endpoint for each.
To revoke a key:
- Click the key's row to open its detail view.
- Click Revoke.
- Confirm.
The key stops authenticating immediately. Any request, in-flight or future, that presents the revoked key receives an authentication error. The revocation event is logged in the audit log; the cause and the operator who performed the revocation are visible there. See Audit Agent Router Activity for the audit surface.
Revocation is permanent from the key's perspective. There is no un-revoke; if the developer needs a replacement, they create a new key in the Console. This is deliberate: a revoked credential cannot be silently re-enabled.
Finding stale keys
The Last Used column makes it easy to find keys that have not been touched in a long time. A common periodic-hygiene workflow:
- Sort the key list by Last Used in ascending order. Keys with no recent activity surface at the top.
- Review the entries against expectations. A test key from six months ago, the credential of a leaver who has not been offboarded, or a CI key for a job that has since moved to another platform: all of these are candidates for revocation.
- Revoke the keys that no longer have a legitimate consumer.
Stale credentials are one of the most common sources of long-term security exposure on AI platforms. The cost of revoking a key that turns out to still be needed is small; the developer creates a new one in a minute. The cost of leaving an unused key alive indefinitely is whatever the worst-case use of that credential would be.
Step 5: handle leavers
When a developer leaves the organization, both the user record and any credentials they hold need to be deactivated. The two are independent and have to be handled separately.
- In Users, locate the leaver's account.
- Confirm or update their status. In an SSO-managed deployment, deactivation in the identity provider propagates on next sign-in attempt; in non-SSO deployments, the status is set directly here.
- Switch to API Keys and filter by the leaver's email as owner.
- Revoke each remaining key.
The order matters: revoking keys first ensures that any automated process still presenting one of those credentials is cut off, even if the user record itself is not yet fully deactivated. Doing it in the reverse order leaves a brief window in which the user is gone but their credentials are not.
Where to go next
The user records and API keys handled in this guide remain in place for subsequent guides.