Create and delete a project
A project is the isolation boundary for a team's models, keys, Model Context Protocol (MCP) servers, policy, and members. The Create Project wizard creates the project and can grant members, models, and MCP servers, and label the data planes that serve it, in the same pass; a project that is no longer needed is deleted from its own page, which revokes its API keys and removes its labels from every data plane.
Every wizard step except Details is optional. A project can be created empty and given members, models, MCP servers, and data planes later: members in Manage project Users and access, MCP in Grant MCP servers and profiles to a project, and data planes in Serve a project from a data plane.
Persona: Platform operator working in the Admin Console.
Estimated time: 5 to 10 minutes per project to create; a few minutes to delete once blockers are cleared.
Outcomes
By the end of this guide:
- A project exists as an isolated configuration and access boundary.
- The members who should work in the project are added, with the creator as admin.
- The models the project may call are granted, with their providers granted automatically.
- The MCP servers the project may use are granted.
- The data planes that serve the project are labelled with it.
- A project can be deleted when it is no longer needed, with its keys revoked and its data planes clearing its configuration.
Prerequisites
- Access to the Admin Console with permission to create projects. The Create Project button is only visible with project write permission. Deleting a project requires permission to manage projects so the Delete project option appears.
- The models the project will use already enabled in the organization's catalog. Adding provider credentials and enabling models is covered in Provision models and providers.
Step 1: open the Create Project wizard
- In the Admin Console, open Projects and select Create Project.
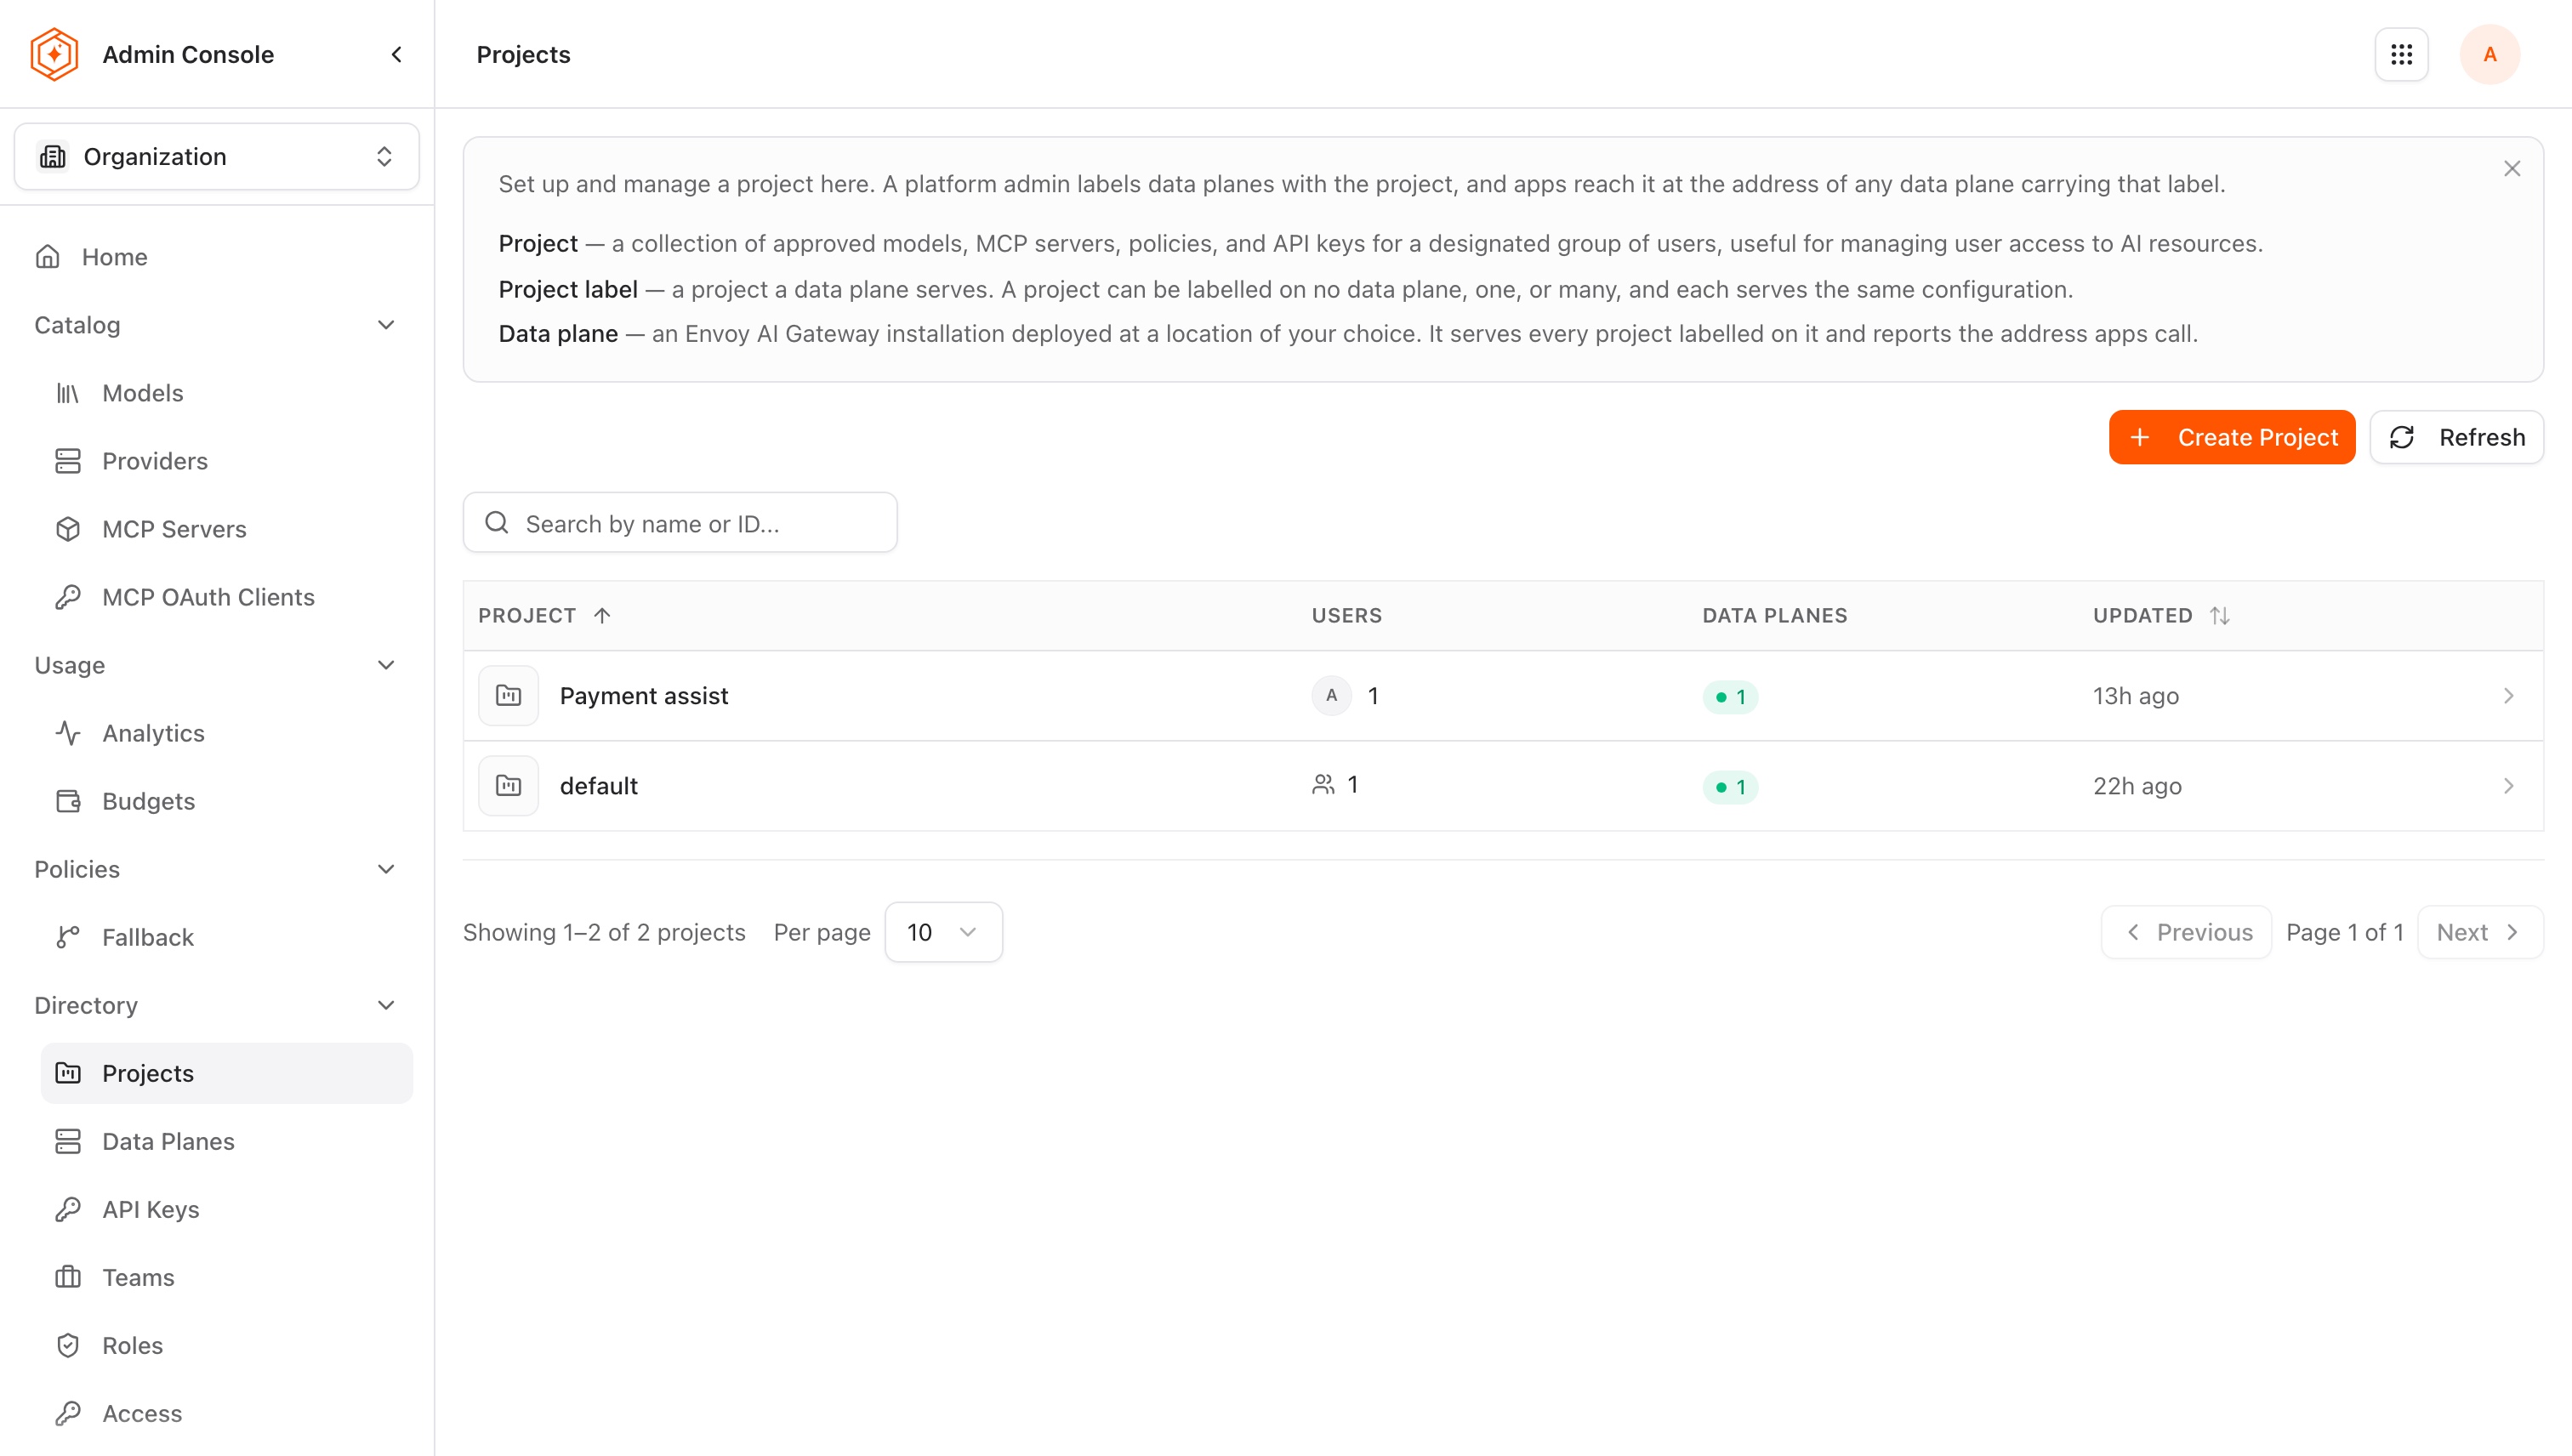
The wizard walks through six steps: Details, Users, Models, MCP servers, Data planes, and Review.
Some steps may not appear at all. The wizard shows a catalog step only if the account can browse that catalog (the user directory, the model catalog, or the MCP server catalog), and shows the Data planes step only if the account can read data planes and edit their project labels. The project can still be created without those steps; someone with the missing permissions adds the grants afterward.
Step 2: name the project (Details)
- Give the project a name that identifies the team, application, or environment it represents, for example
bedrock-team. - Review the generated Project ID. It is suggested from the name and can be edited, and must use only lowercase letters, digits, and hyphens. The ID becomes the project's path, shown under the field as
/projects/<id>. - Optionally add a description.
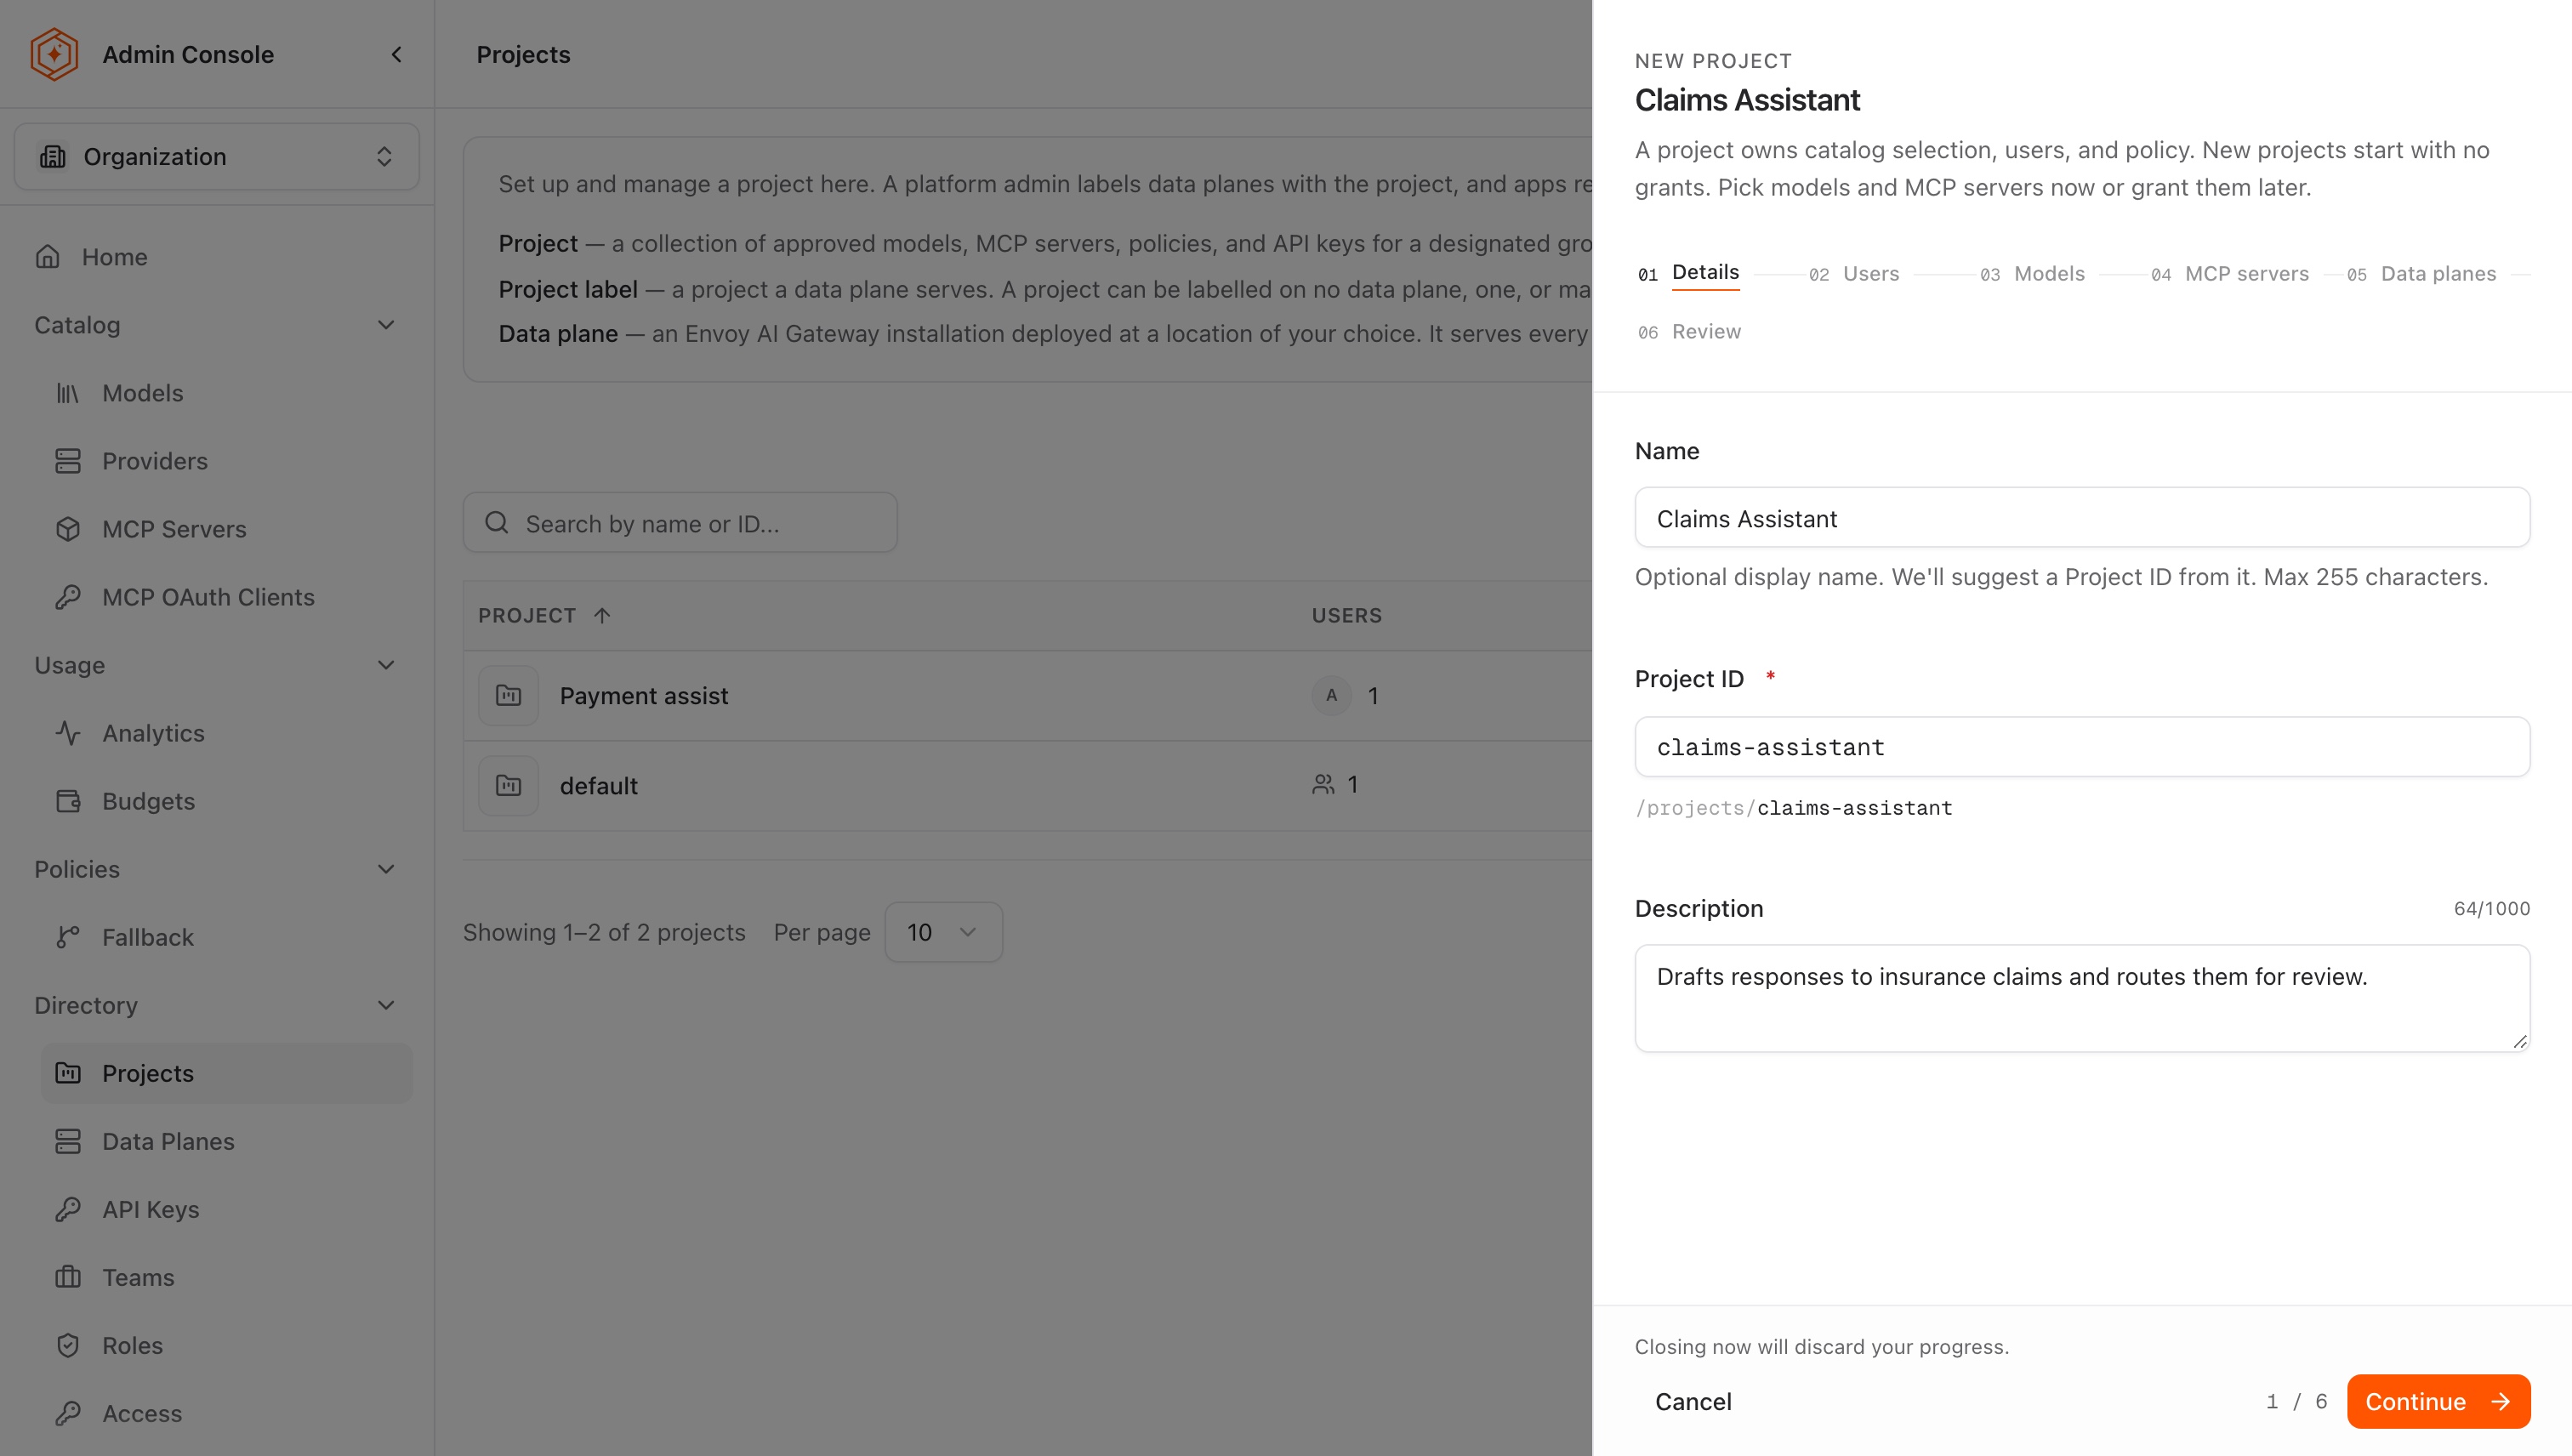
The name is an optional display name; the Project ID is the required, permanent identifier.
Step 3: add Users (optional)
- Search for users by name or email, or browse by team, and select the people who should have access.
- Optionally select a whole team to add all of its members at once.
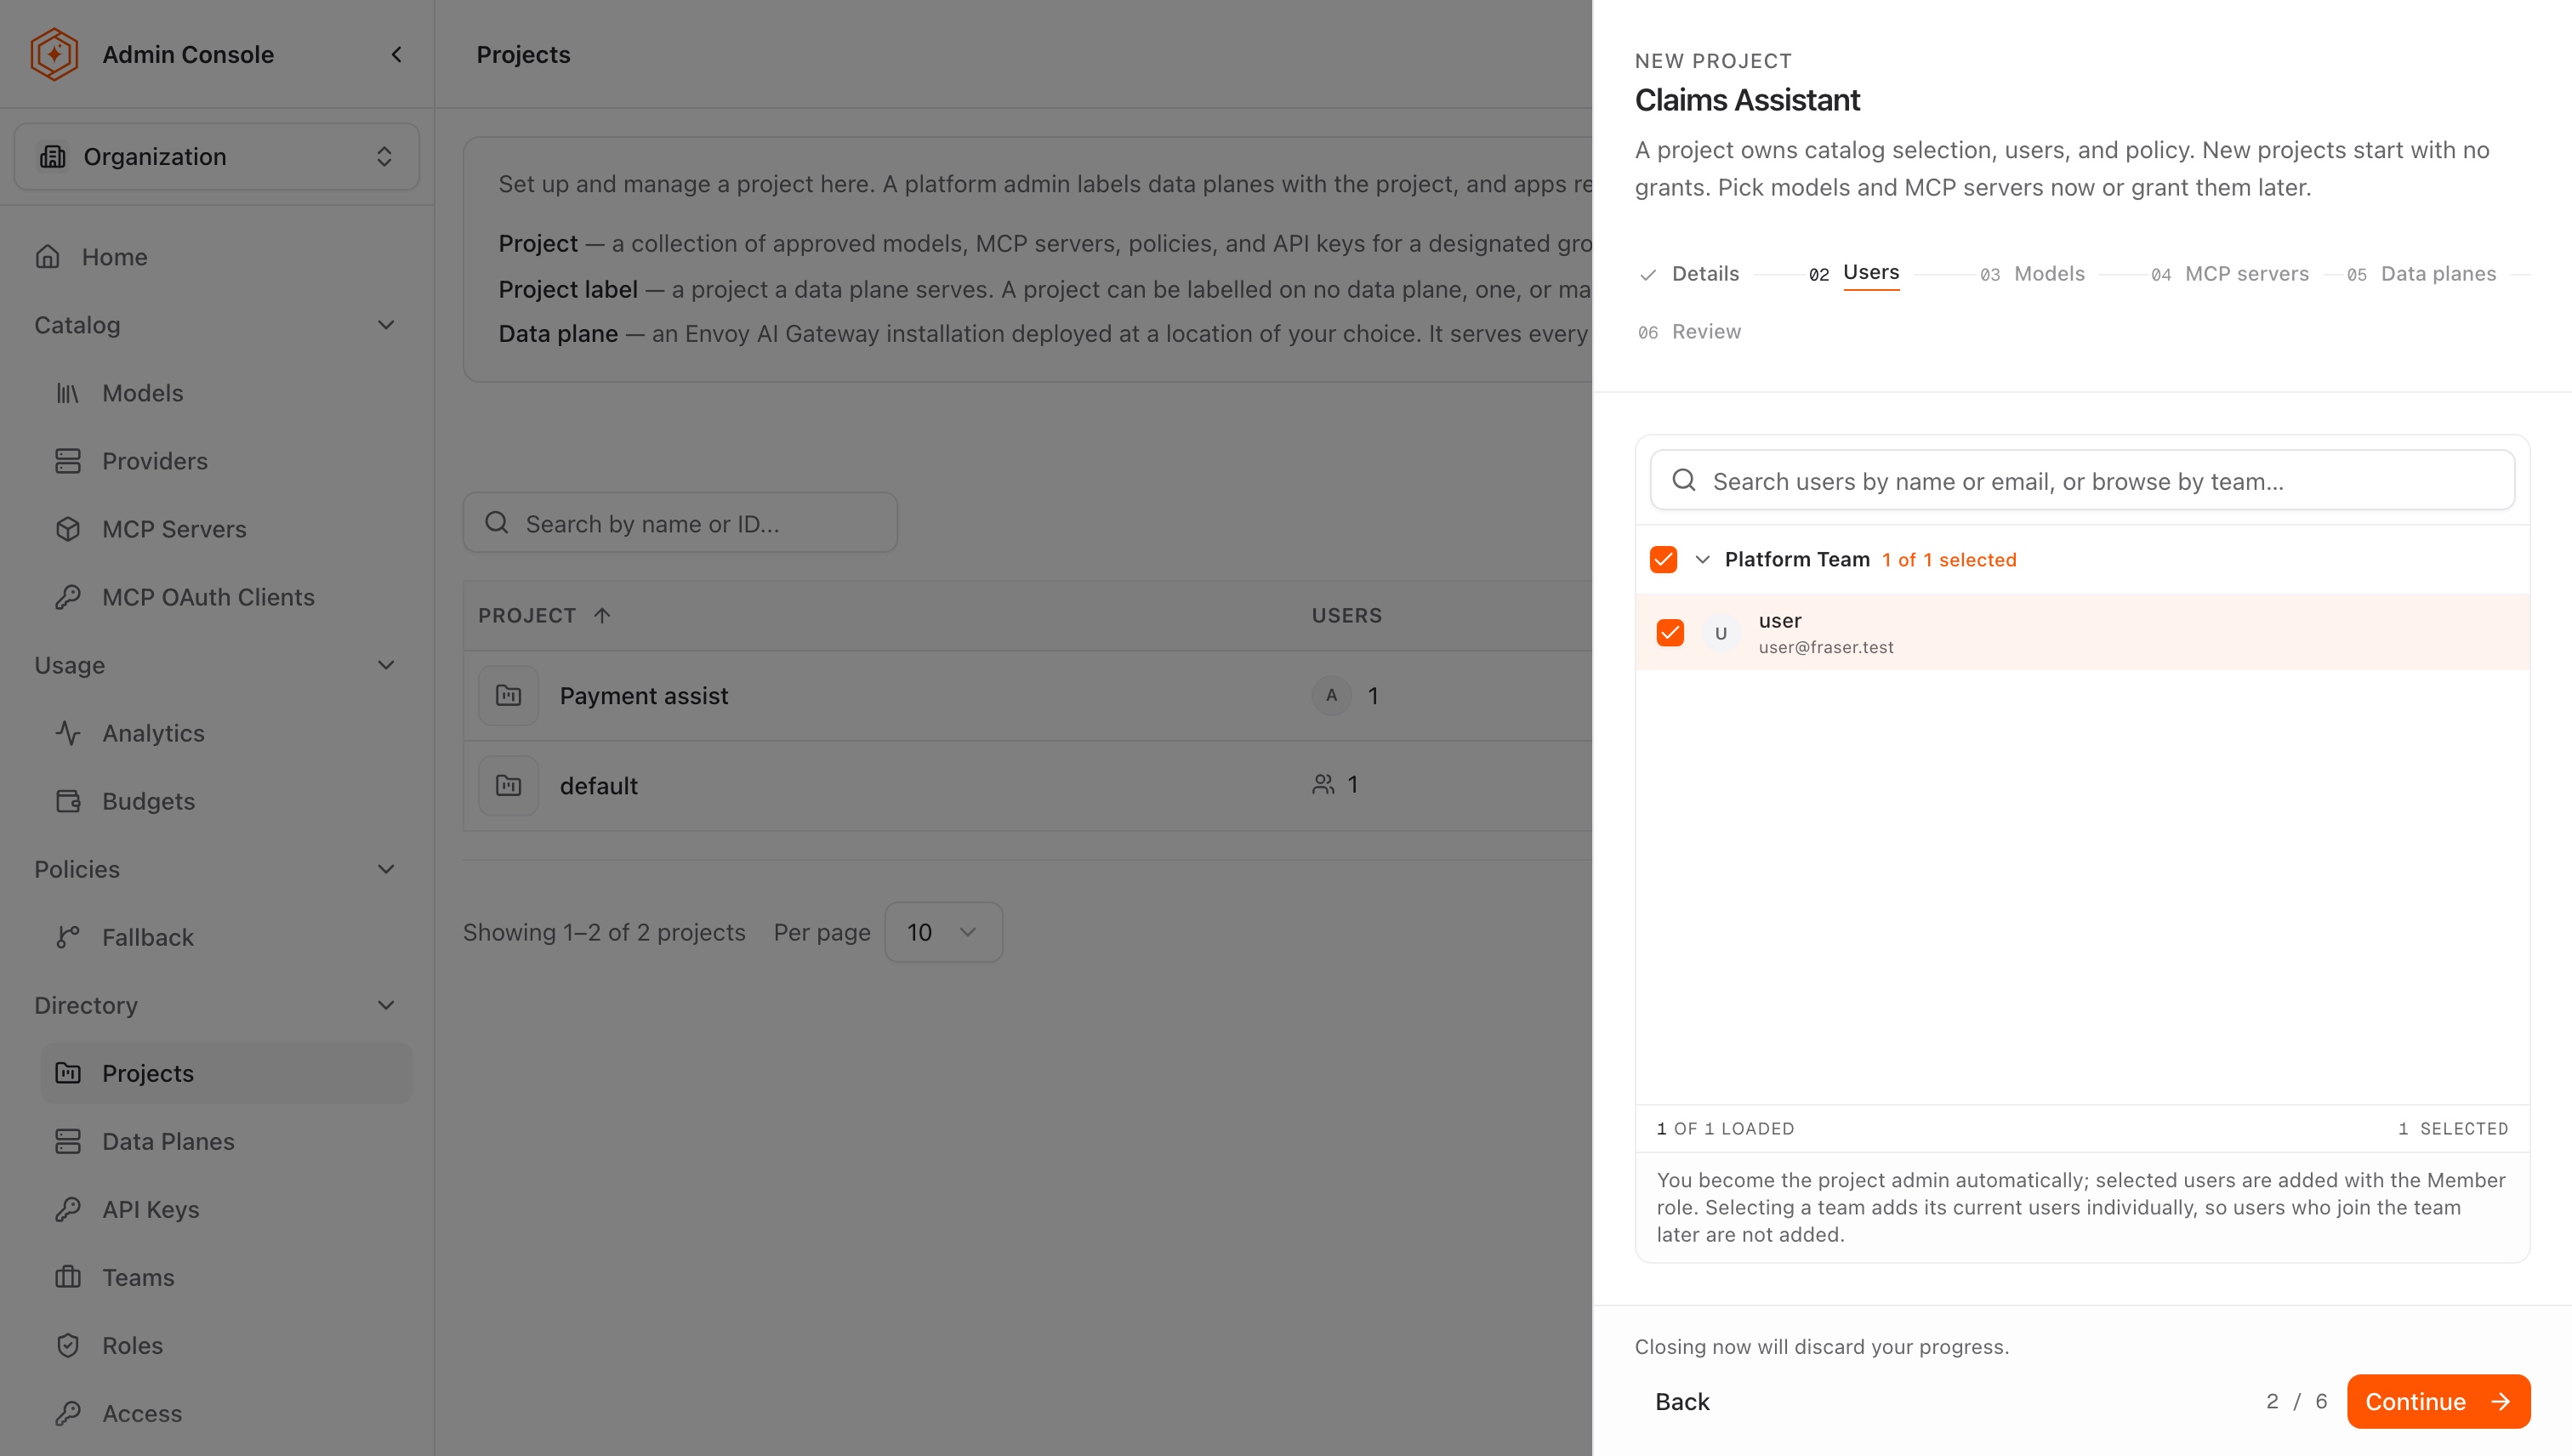
The creator becomes the project admin automatically; everyone selected is added as a User. Selecting a team adds its current members individually; users who join the team later are not added to the project. Roles are adjusted later in Manage project Users and access.
Tetrate Agent Router creates a user's record the first time they sign in, so only people who have already signed in show up in this search. Someone who has been invited but has not signed in yet cannot be added here. See Onboard developers and issue keys.
Step 4: grant models (optional)
- Pick the models the project may call, grouped by provider. Select all models from a provider in one click, or search across all models.
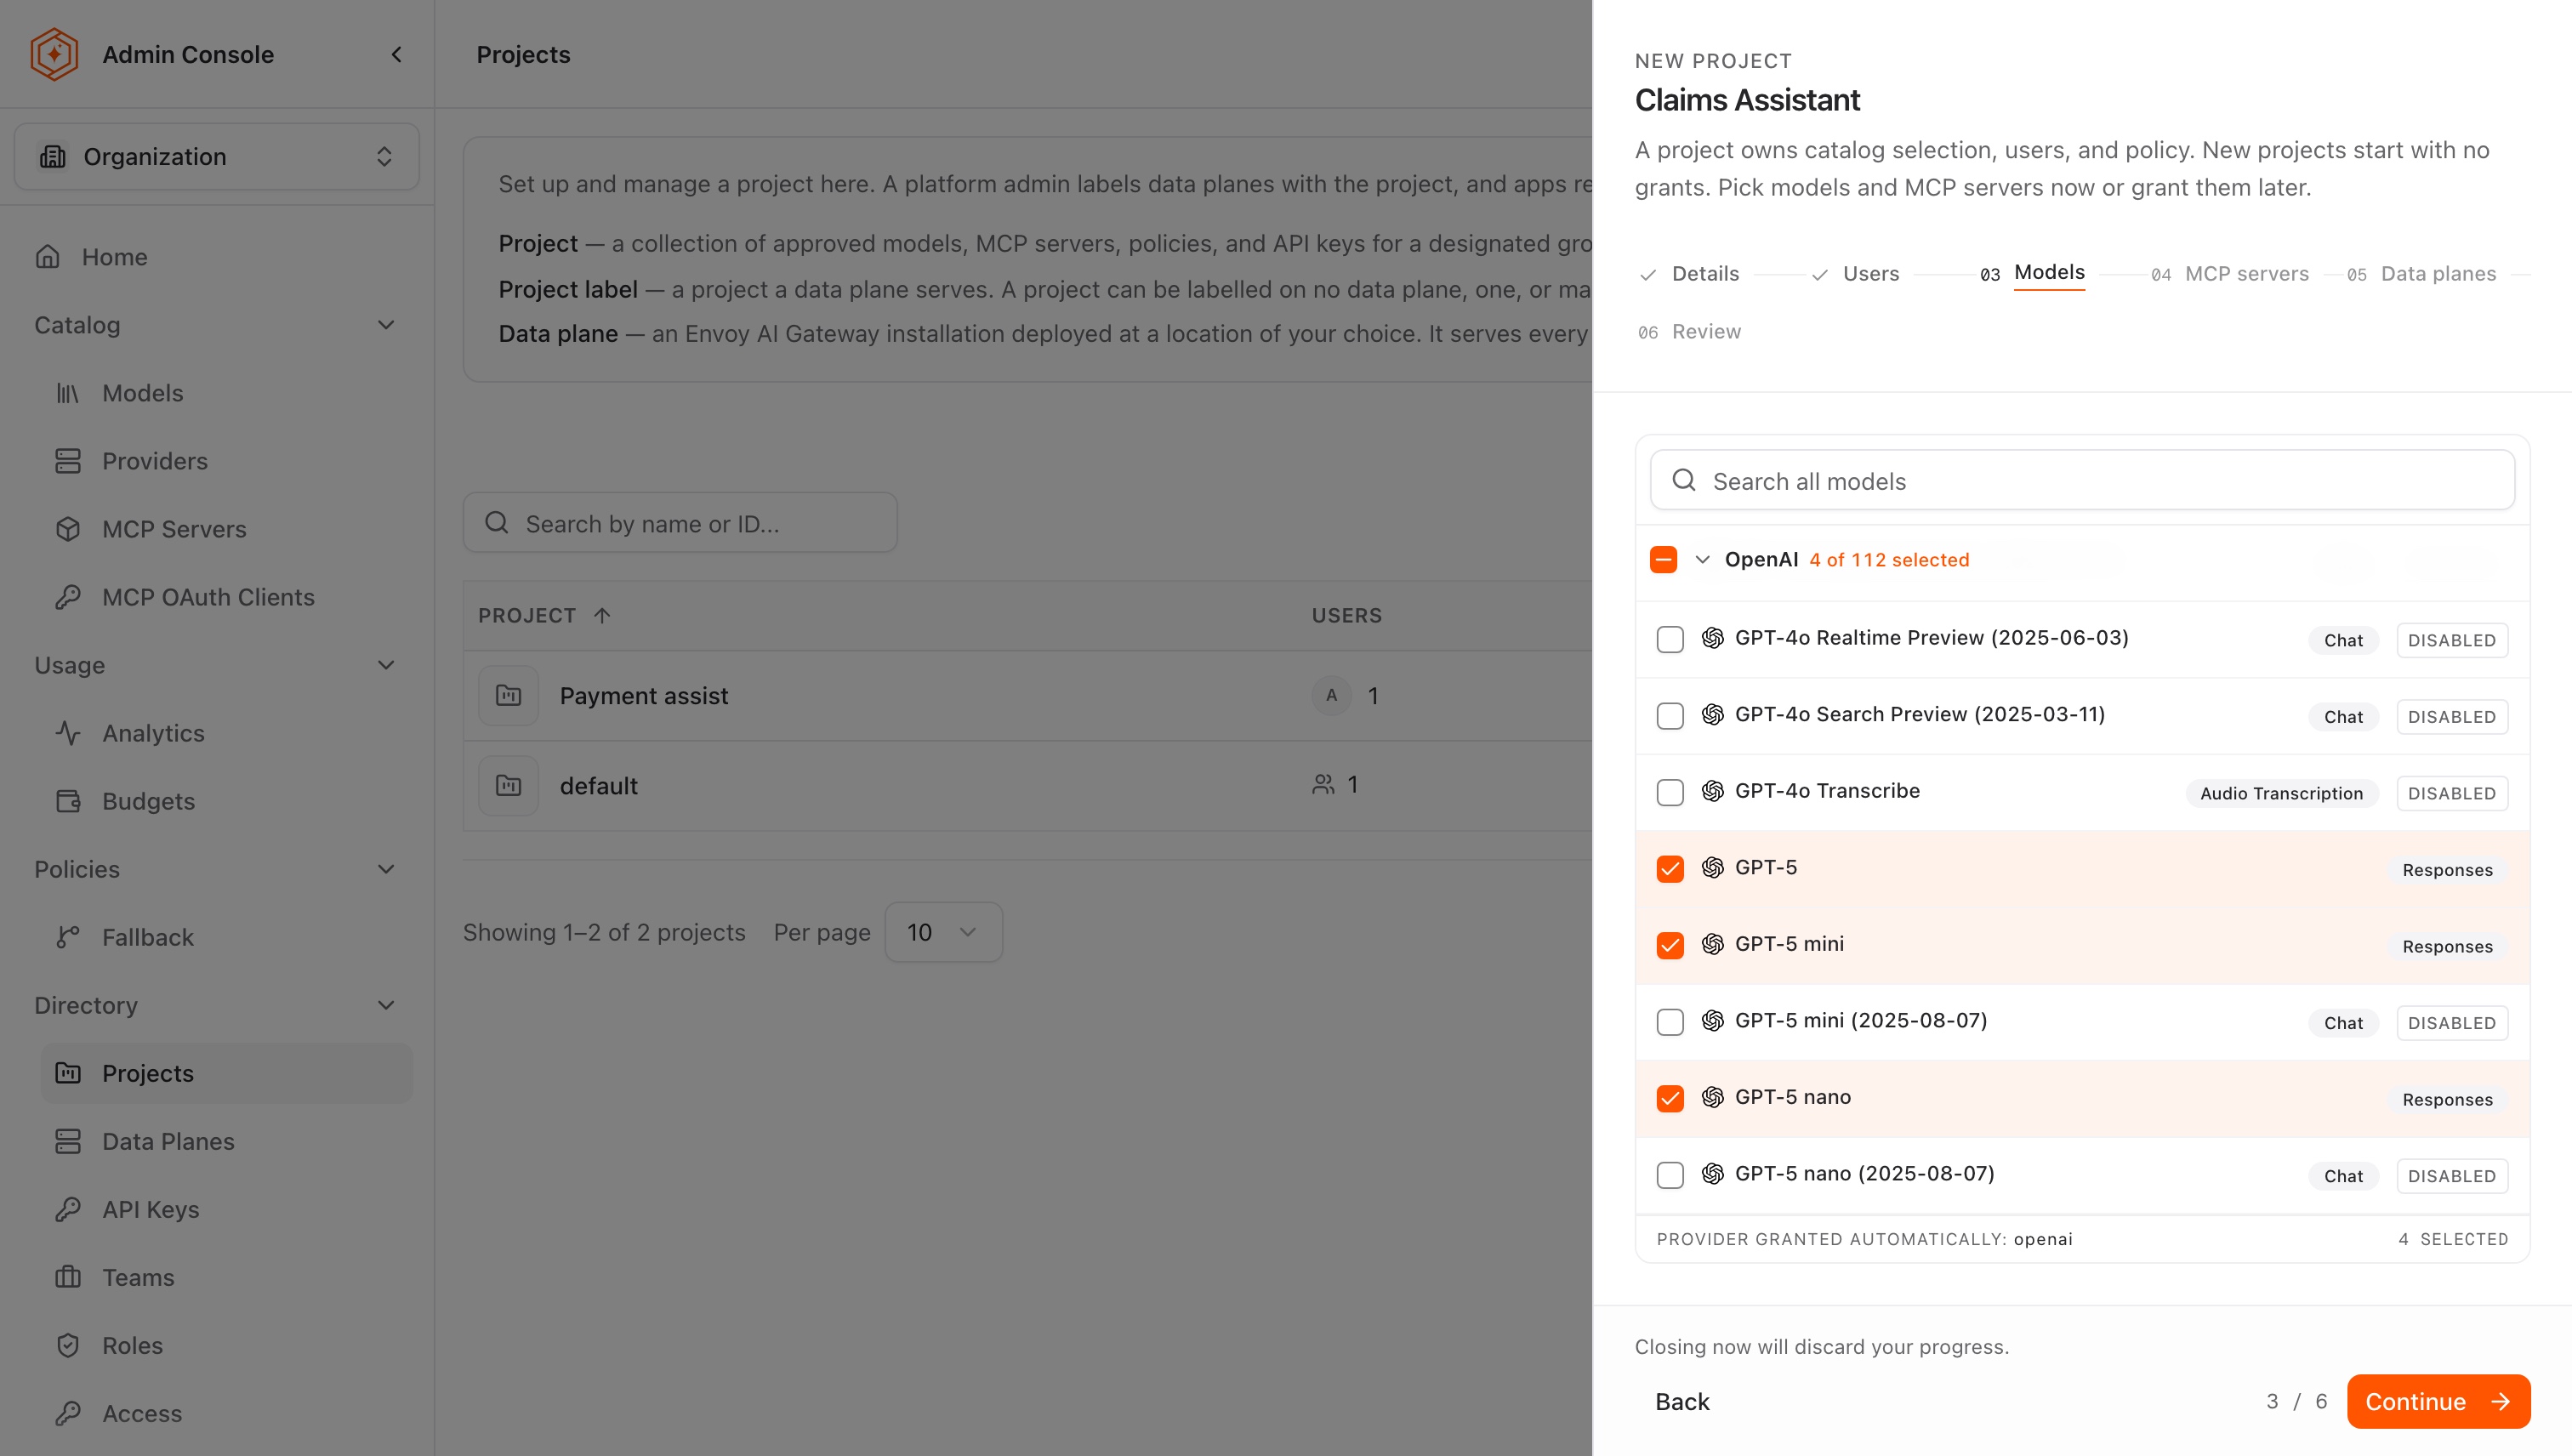
Providers are granted automatically based on the models picked. There is no separate provider-grant step. Model access remains explicit: a model that is not granted cannot be reached through the project's gateway and is refused at request time with 404. This explicit grant is the mechanism behind per-project model isolation. Only models already enabled in the organization catalog appear here.
The breadth of this picker is the browse scope, not the routable set. An account that can browse the organization catalog (an organization administrator, most commonly) is shown every enabled model here, and the project's gateway still serves only the models actually granted on this step. Seeing 150 models in the picker and reaching 2 through the gateway is the grant working as designed, not a fault; GET /v1/models on the gateway returns the granted set (see Models API).
Step 5: grant MCP servers (optional)
- Pick the MCP servers the project may use from the organization's catalog.
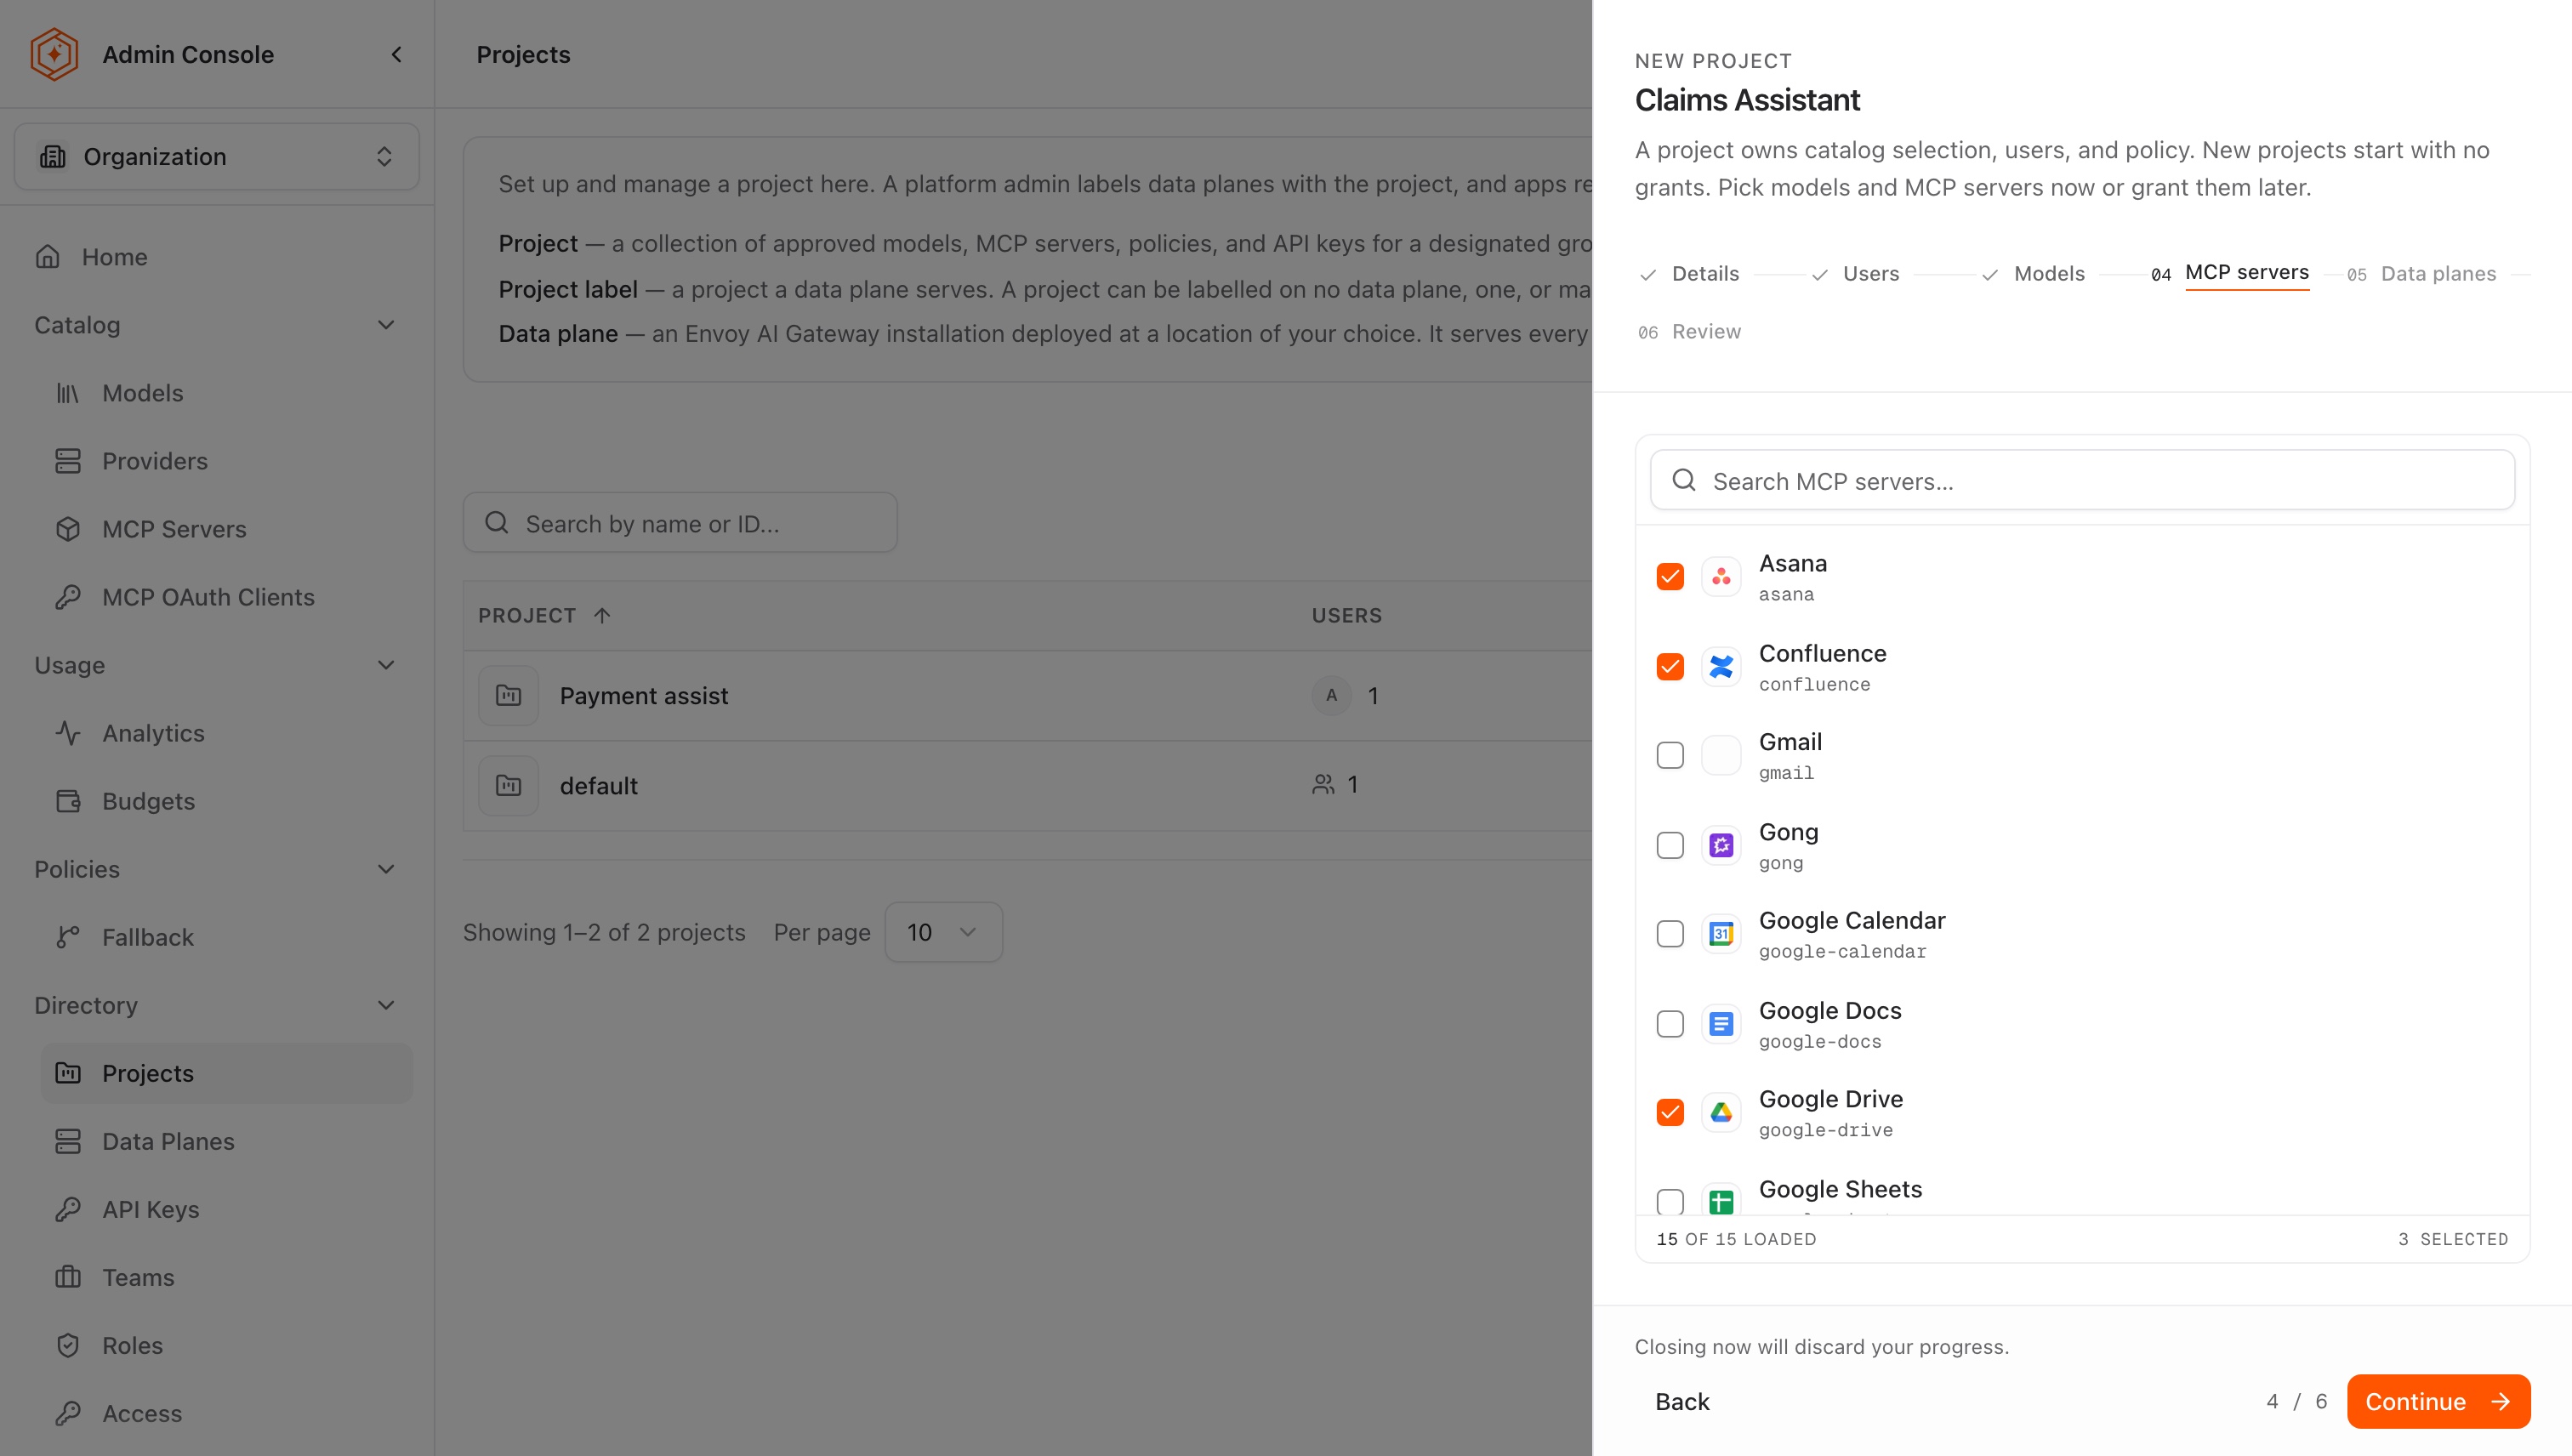
Granting servers here scopes them to the project; building a profile that exposes them to clients is covered in Grant MCP servers and profiles to a project.
Step 6: label data planes (optional)
- Pick the data planes that should serve the project. Each one is labelled with the project when the project is created.
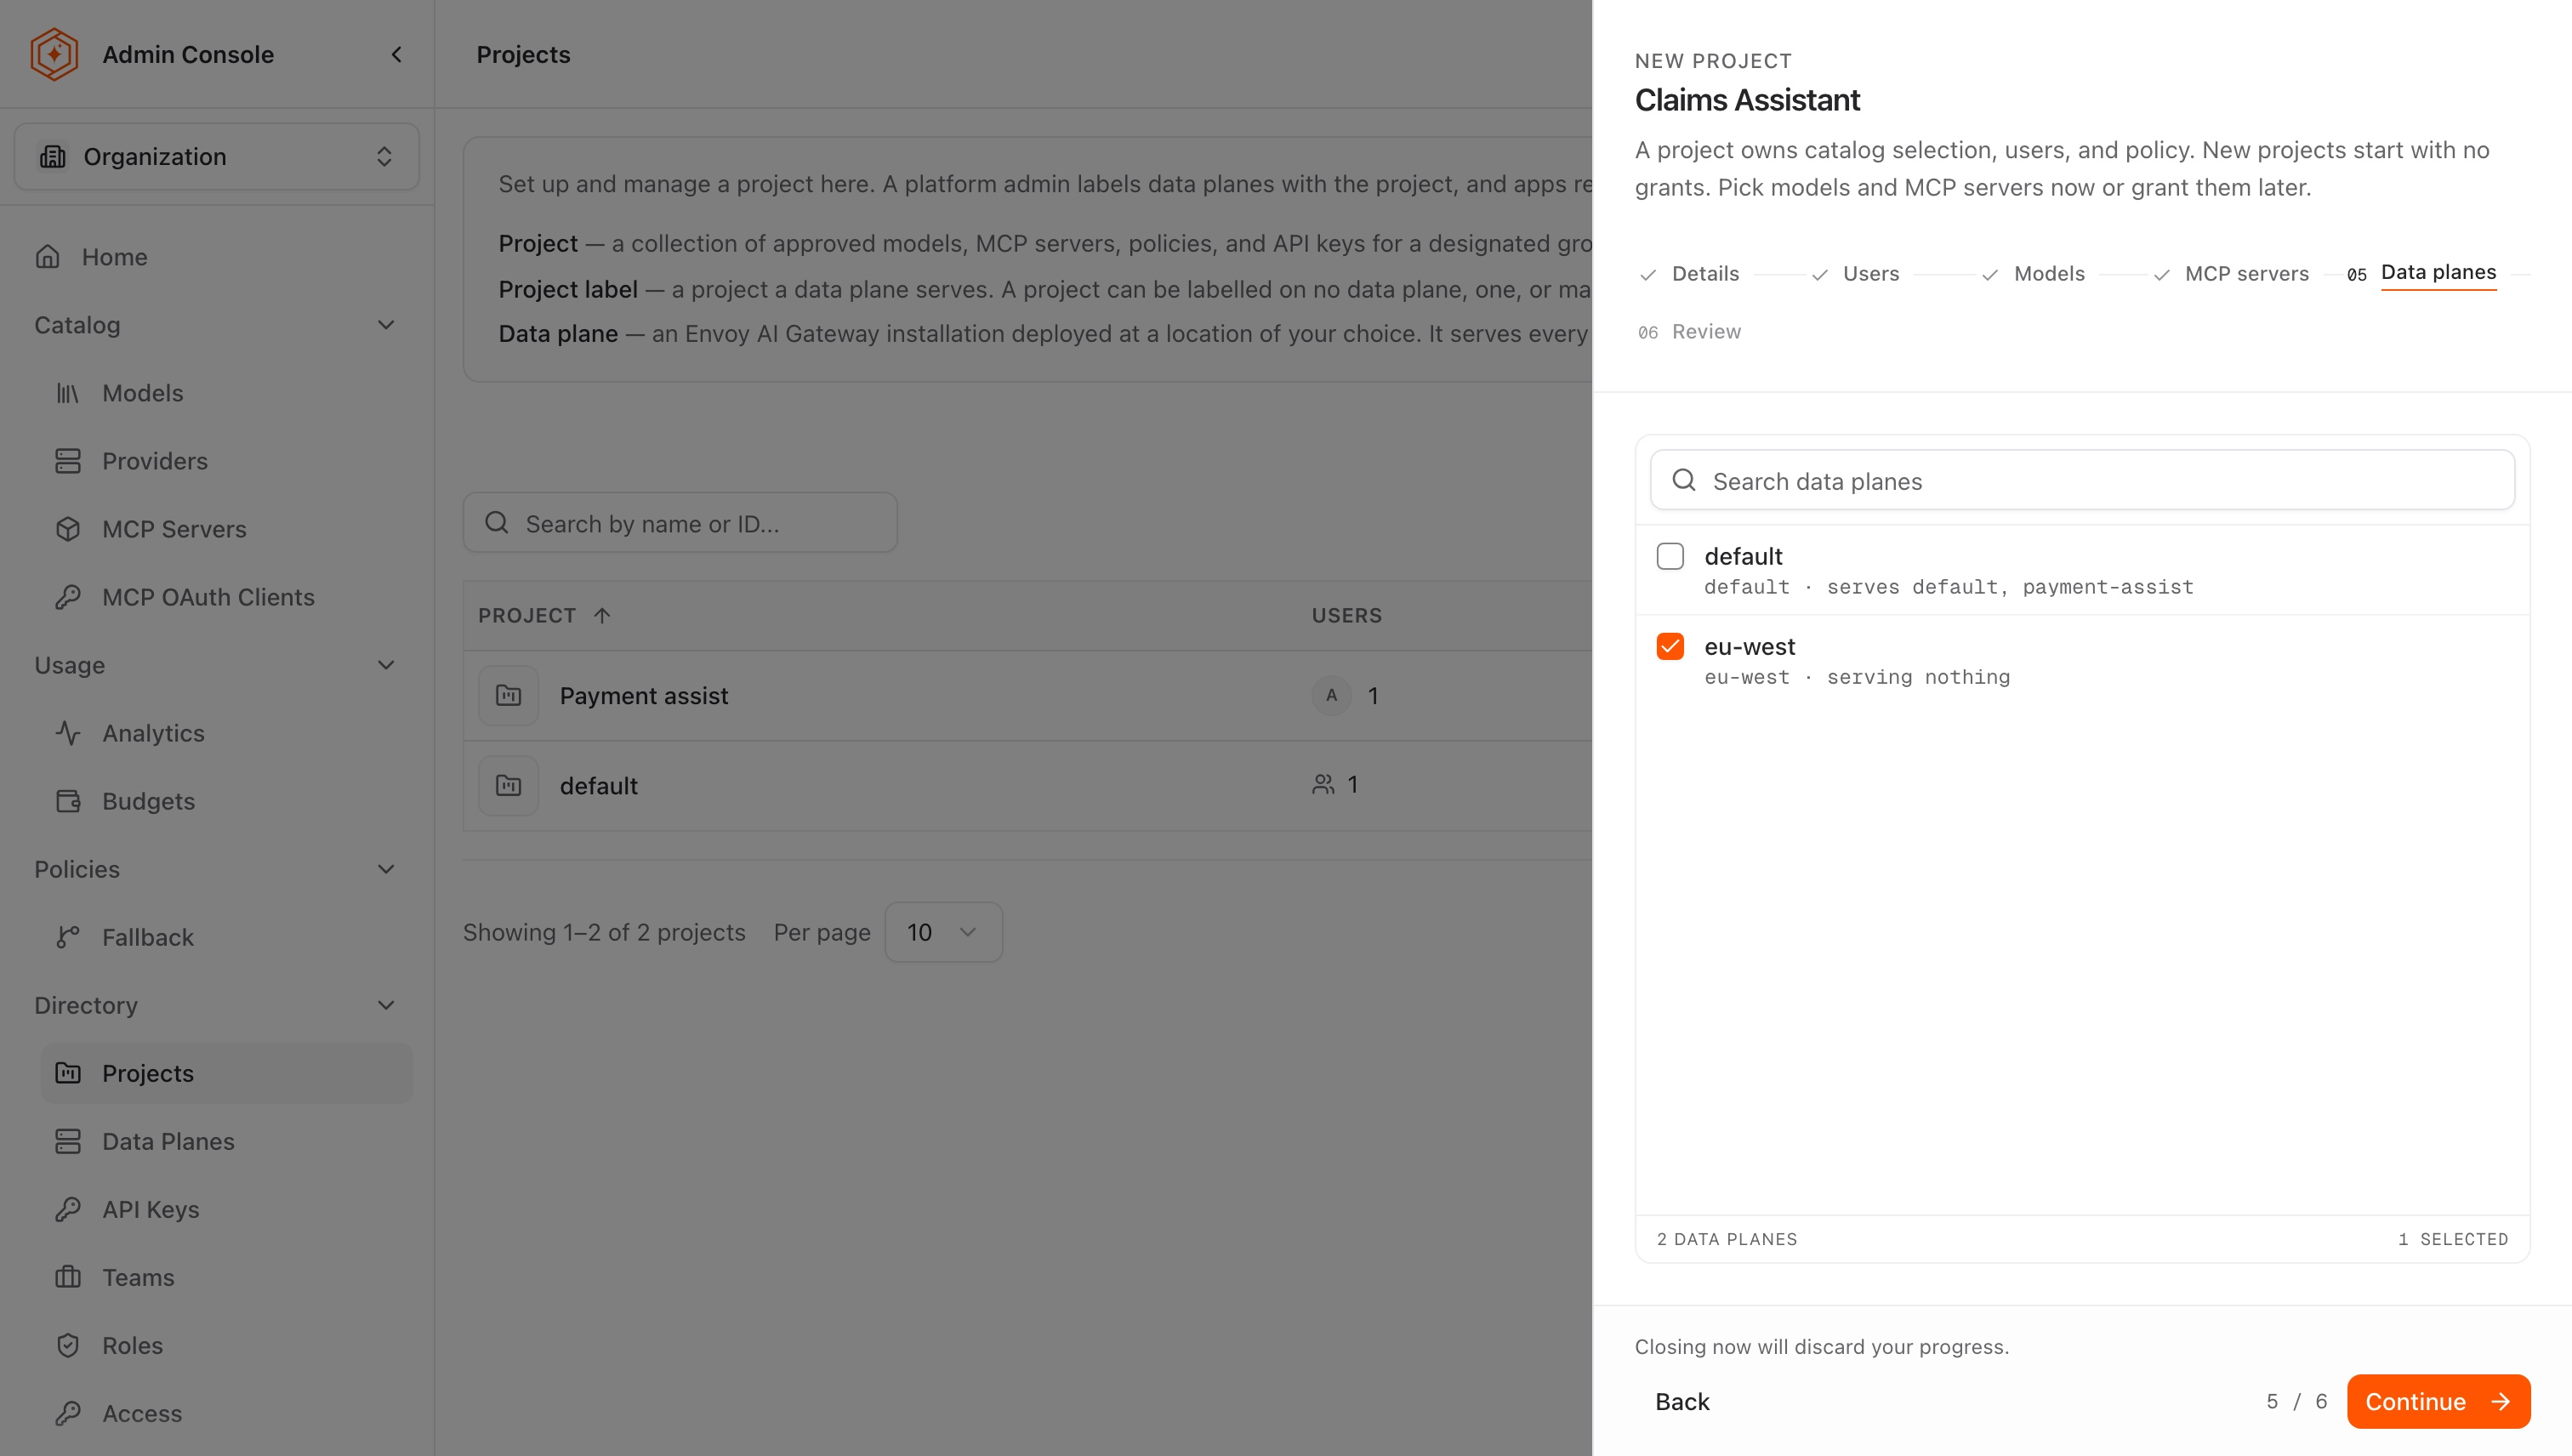
A data plane serves every project labelled on it, on every hostname it declares, so picking a data plane that already serves other projects needs no new hostname. A data plane already serving a project accepts a second one only once it reports 0.7.0 or later. With no data planes registered, the step reads No data planes yet. Add one on the Data planes page, then label it with this project. The project can be created without a data plane and labelled later; until then developers see it as ready but not callable. See Serve a project from a data plane.
Step 7: review and create
- Check the summary of members, models, MCP servers, and data planes. Expand a section to remove individual items before creating.
- Select Create project.
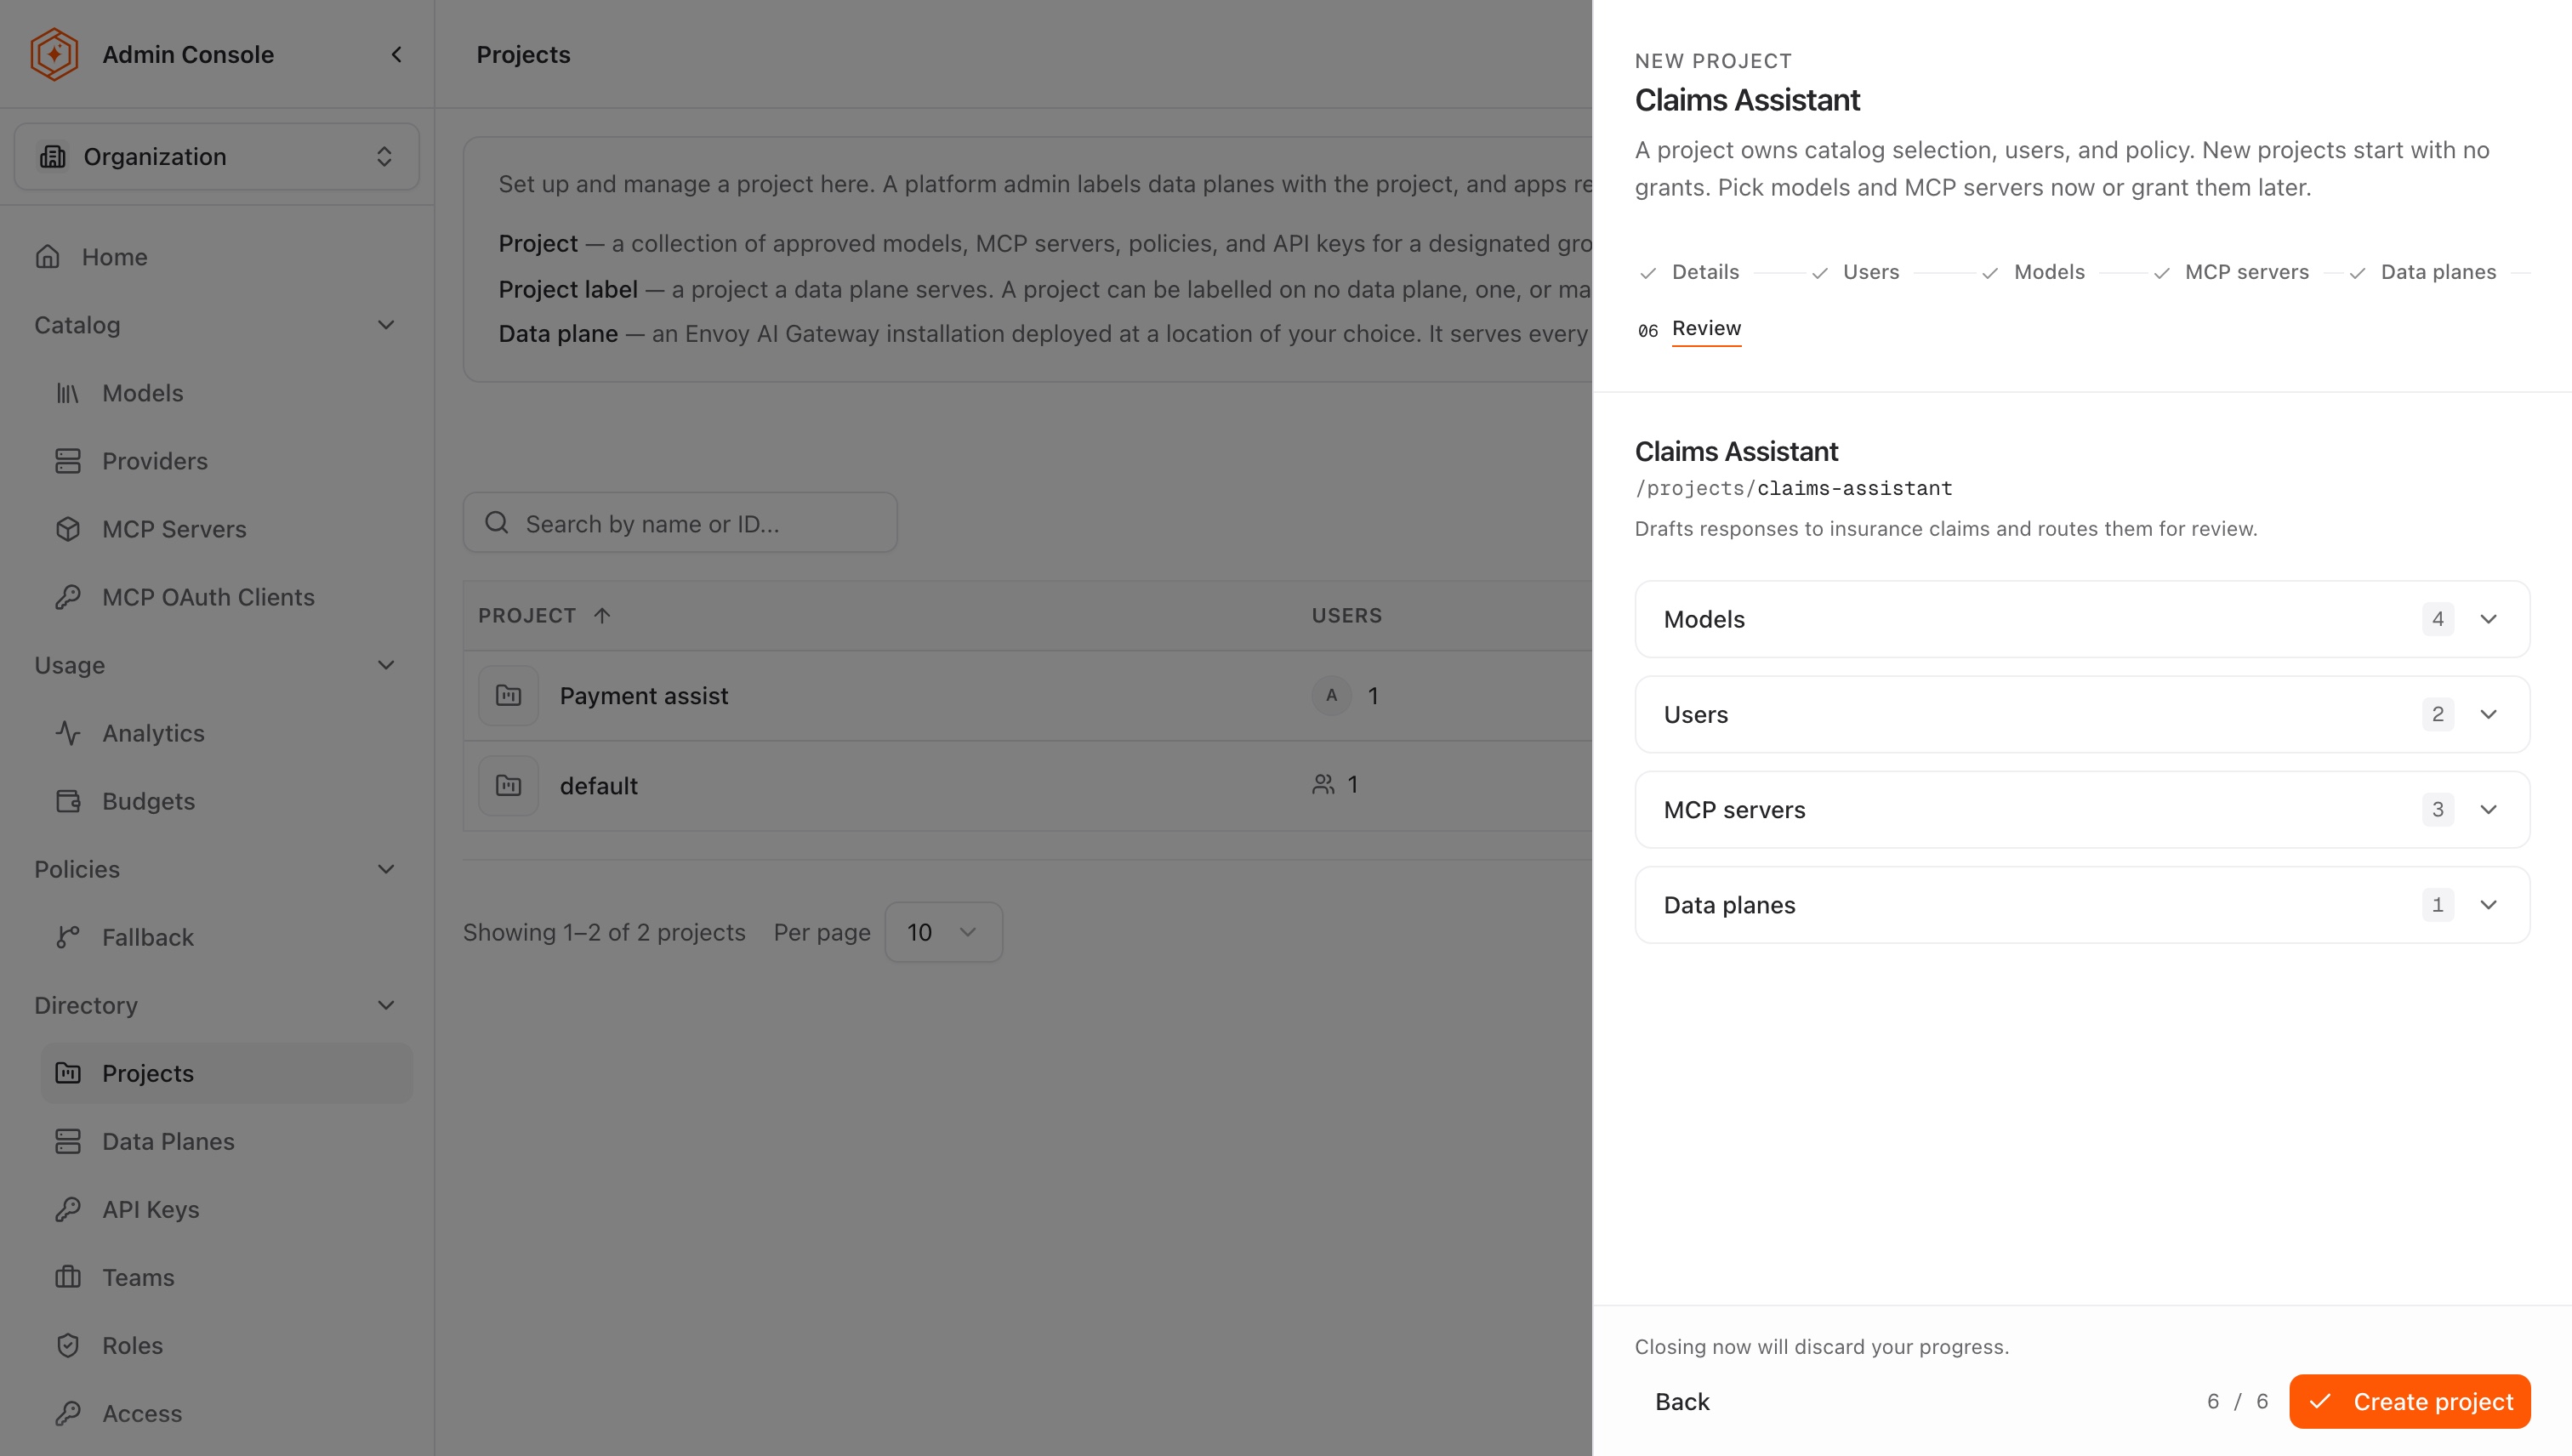
If any grant fails during creation (for example one provider errors), the project is still created, and a warning lists what did not apply. Re-apply the missing grants from the project's pages afterward.
Delete a project
To remove a project that is no longer needed, open the project's page and select Delete in the header. The default project created during onboarding cannot be deleted.
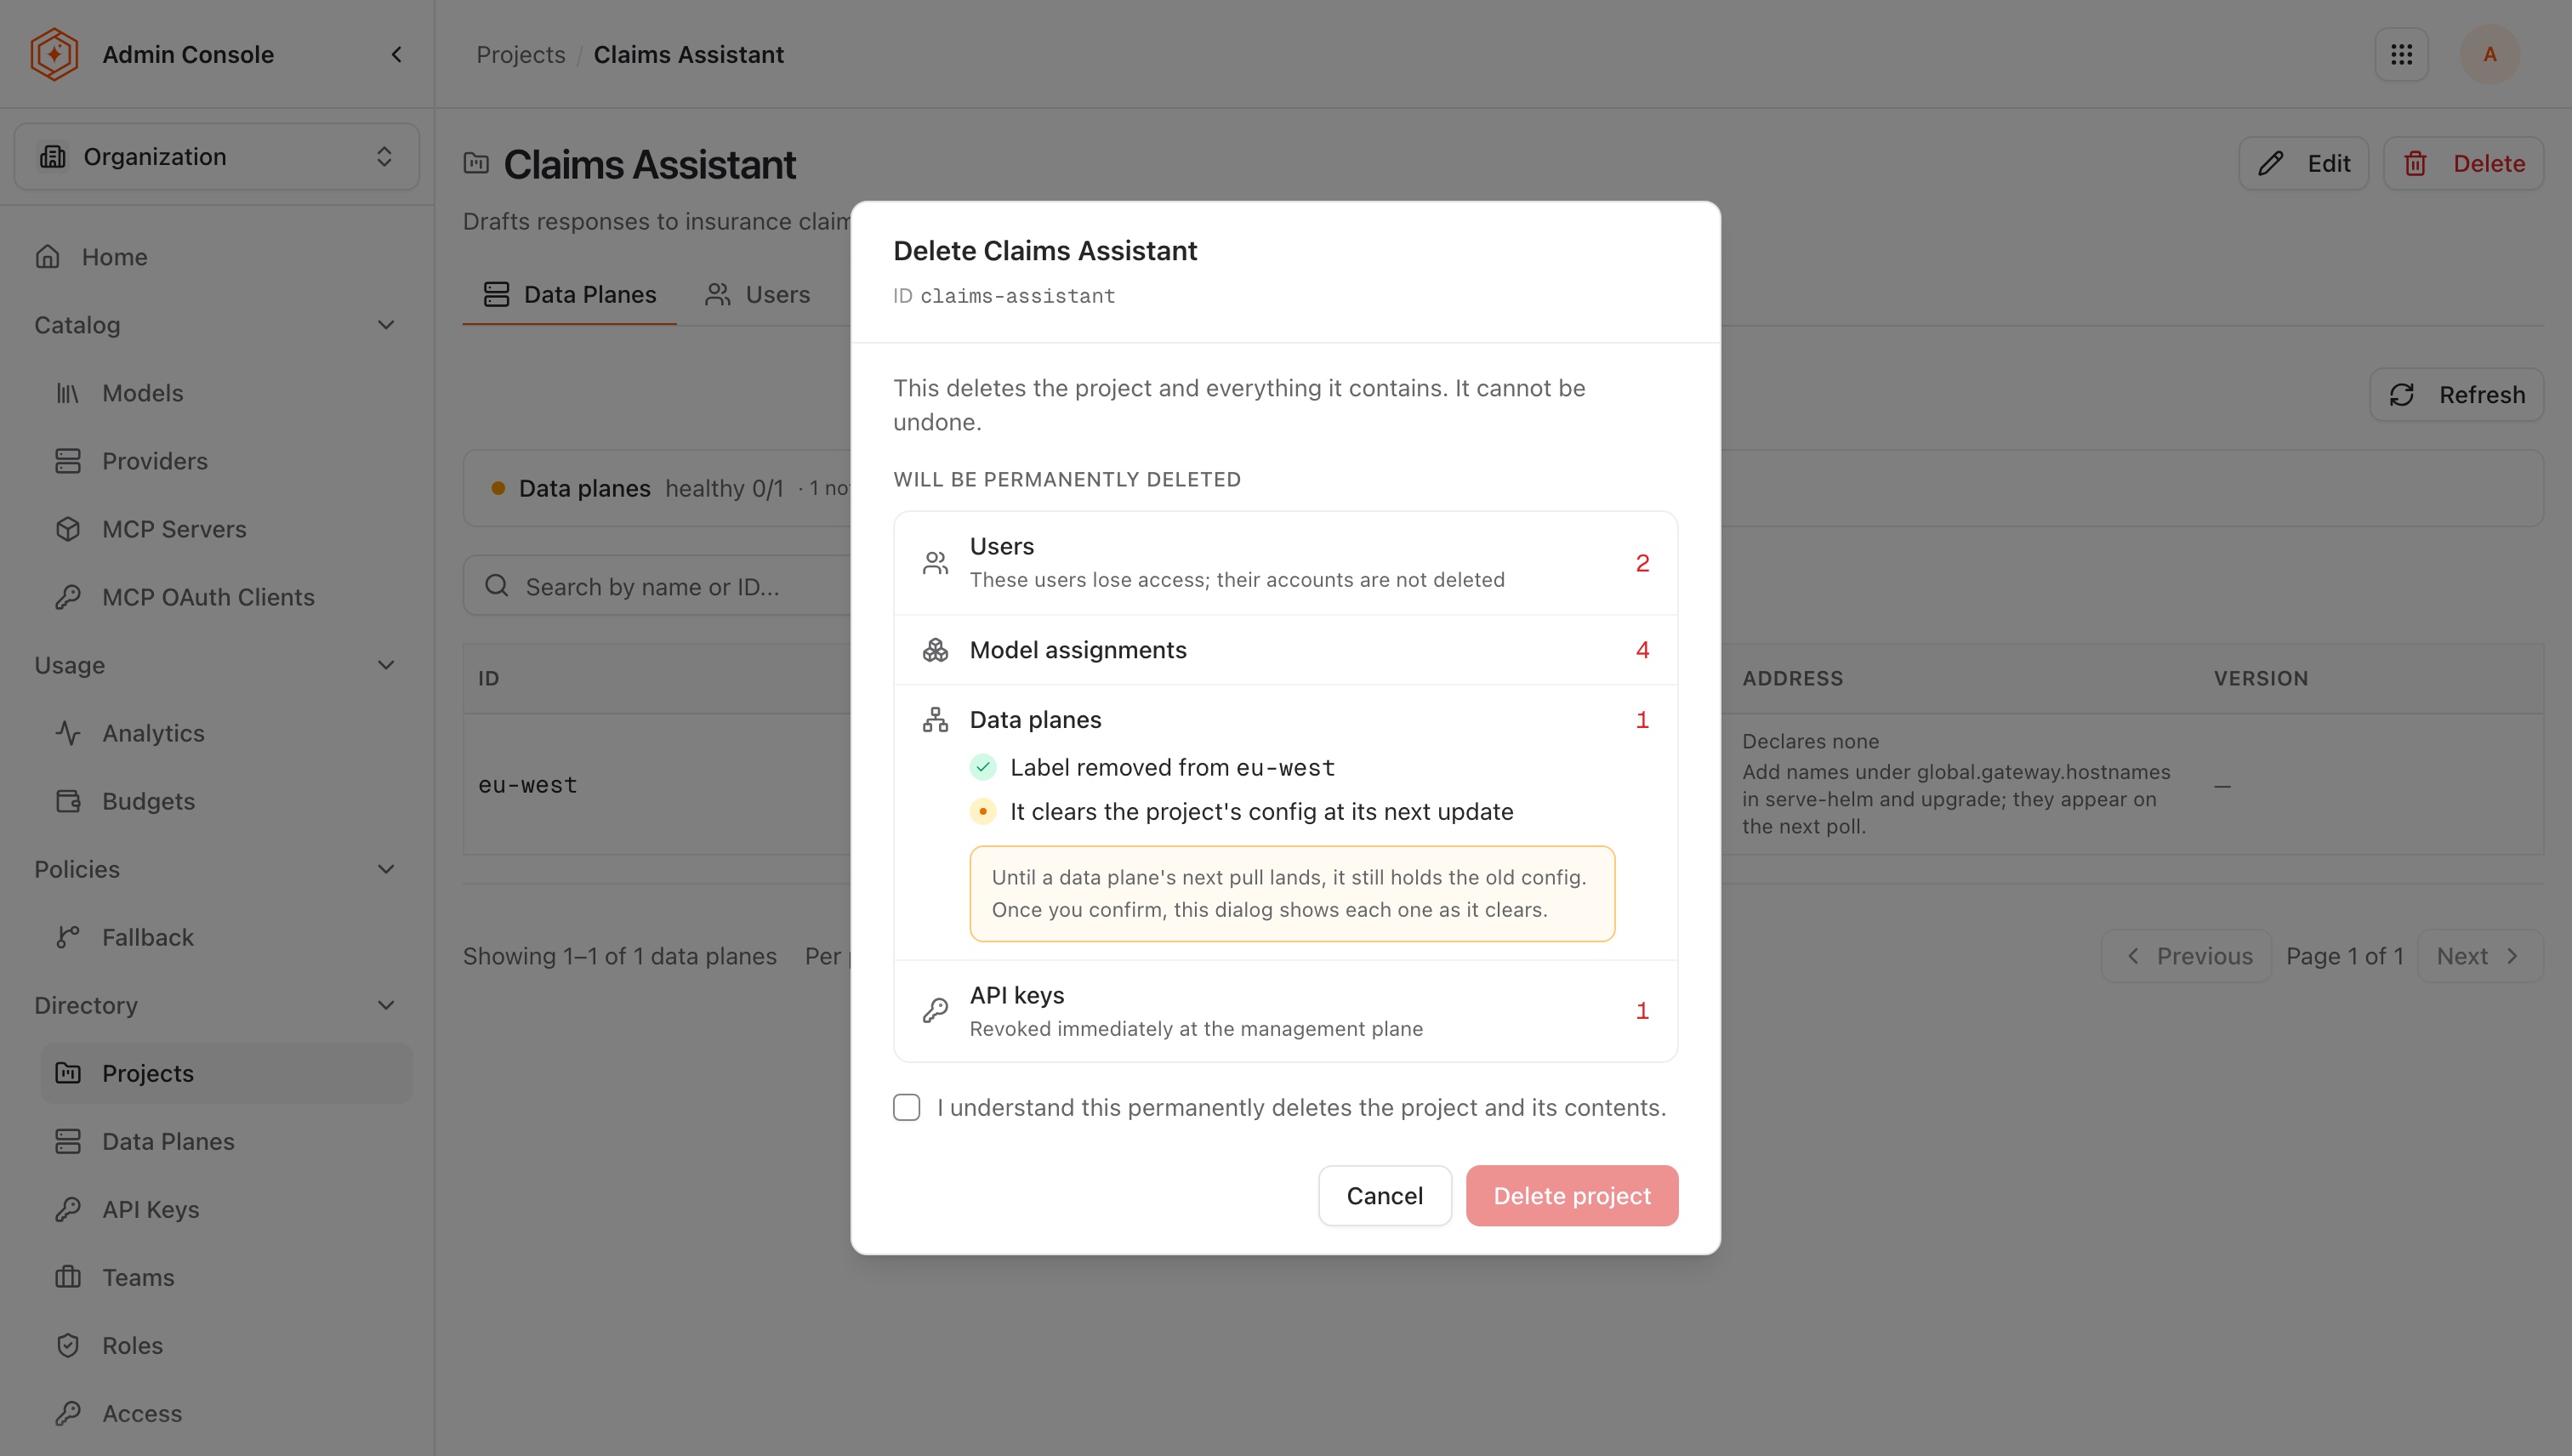
A confirmation dialog opens and shows the impact before anything is removed.
When something is blocking the delete
Since 0.7.0 only project settings block the delete. API keys and data plane labels are removed with the project. If the project has settings (rate limit or global fallback), the dialog lists them, and because they have no other screen it provides a one-click Clear settings control. Once they are cleared, the delete control unlocks.
When nothing is blocking the delete
The dialog previews what the delete removes, counting each kind that is present: the project's Users, its model assignments, the data planes it is labelled on, and its live and revoked API keys. Select the I understand checkbox, then select Delete project.
Check which keys the project holds before deleting it. The delete revokes them rather than stopping to report them.
What gets removed
The project and everything attached to it are removed in one step: members, model assignments, provider and MCP server grants, and its label on every data plane. Removed members lose their project permissions. The project's API keys are revoked at the management plane and stop being accepted at once.
Each data plane that carried the project's label keeps serving the configuration it last pulled until its next configuration update, then clears the project. The dialog lists those data planes after the delete and shows each one as clearing until it has, and the admin API reports the same progress with GetProjectDeletionImpact, where each data plane reads CLEARING and then CLEARED. The dialog can be closed while that happens; the data planes clear the project either way.
Shared organization resources are not deleted. Models, providers, MCP servers, users, and data planes themselves remain; only the project's grants, memberships, and labels are removed. Deletion is permanent. The project's name becomes available again right away, so a new project can reuse it.
Where to go next
A project with granted models is still configuration with nowhere to send traffic until a data plane is labelled with it.