Create and manage teams
A team is a named group of users in the Tetrate Agent Router directory, created with the New Team wizard on Directory → Teams. Teams exist so that access can be granted once to a group instead of person by person, and so that cost and usage can be attributed to a group rather than only to individuals.
Persona: Platform operator working in the Admin Console, holding a role that can manage users and teams.
Estimated time: 5 minutes to create a team; recurring thereafter as people join, move, and leave.
What a team is used for
A team carries no permissions of its own. Its value comes from the places that accept a team where they would otherwise accept a single user.
| Purpose | Where it applies |
|---|---|
| Grant a role to a group once rather than per person | Directory → Access, described in Manage roles and permissions |
| Add a group of people to a project in one step | The Members step of the Create Project wizard, described in Create and delete a project |
| Attribute cost and usage to a group | The Team filter in Analytics, described in Compare user and team spend in Analytics |
| Identify which group a person belongs to | The team is shown in user listings |
Outcomes
By the end of this guide:
- A team exists with a name and, optionally, a description.
- The initial members have been selected, and any move out of a previous team has been seen before it was applied.
- The effect of exclusive membership on inherited access is understood.
- The team is ready to be used as the target of a role grant, a project membership, or an Analytics filter.
Prerequisites
- Access to the Admin Console (
https://dashboard.<tenant>.tetrate.ai) with a role that can manage users and teams, such as Super Admin or User Admin. - The intended members already exist as users. A user record is created on first sign-in, as described in Onboard developers and issue keys.
In this guide
- Tasks: create a team and populate it
- Concepts
- Reference
Step 1: open the New Team wizard
- In the Admin Console, go to Directory → Teams.
- Select Add team.
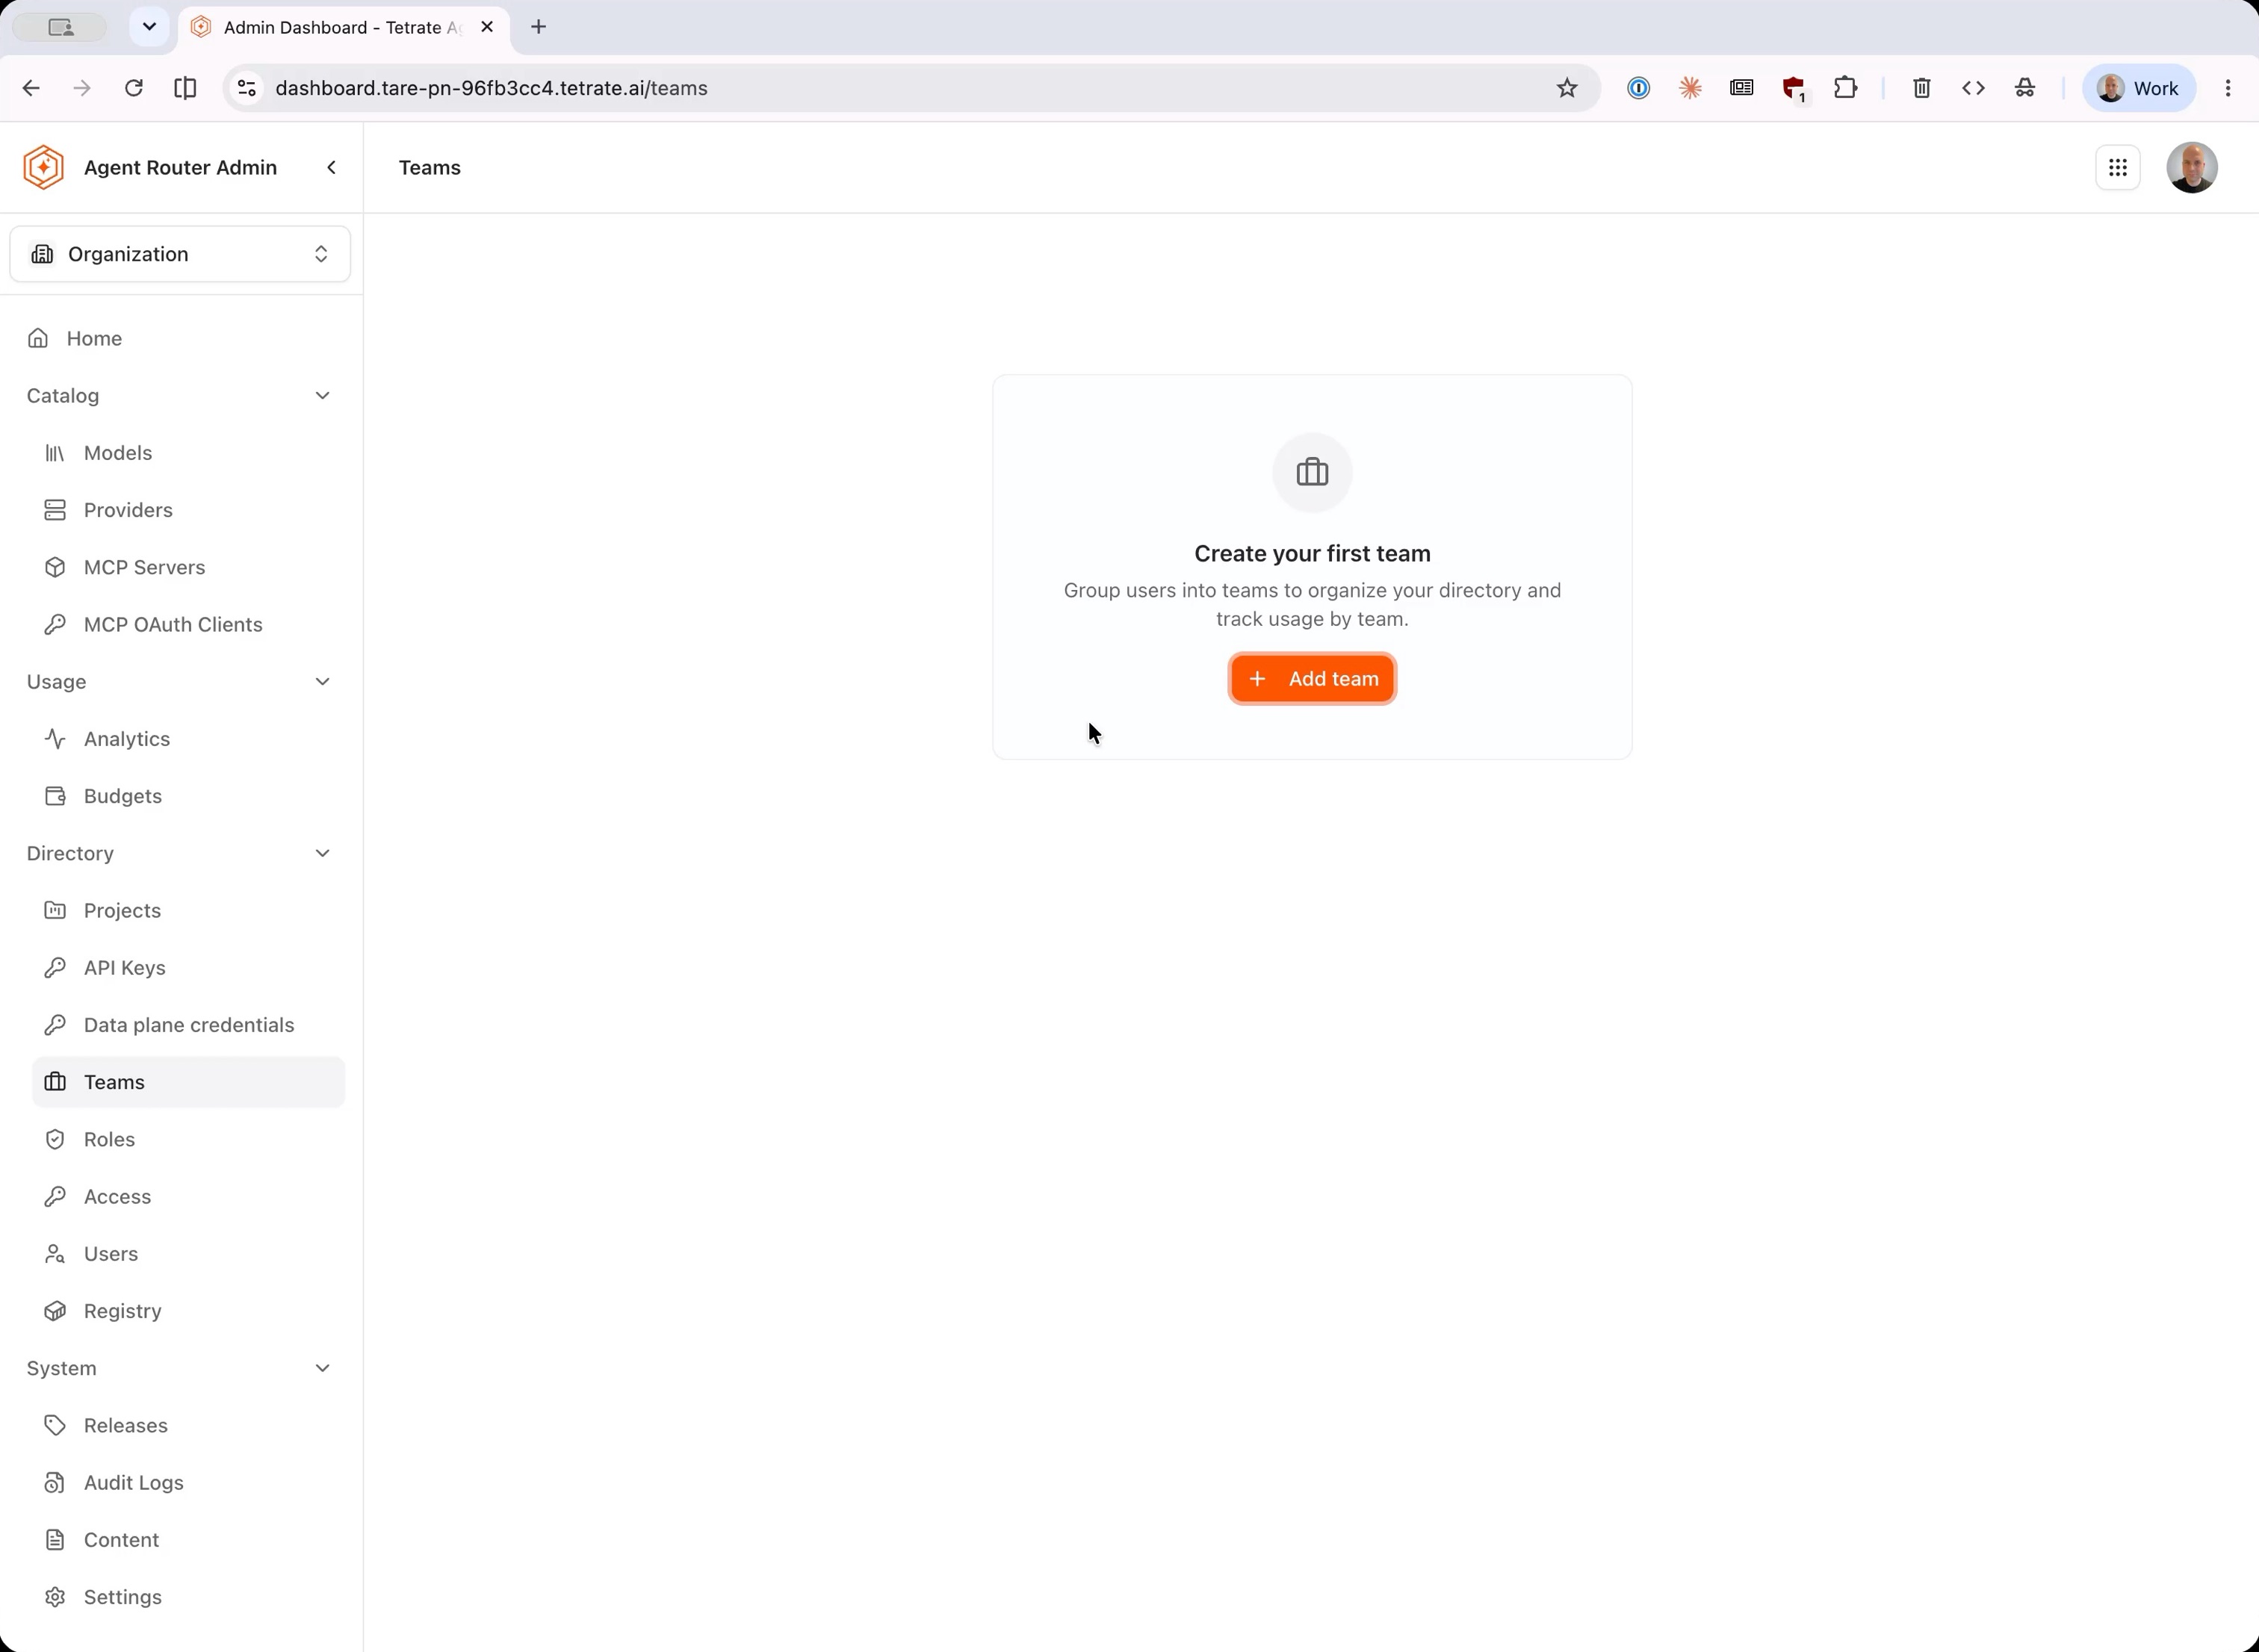
Where no team exists yet, the page shows a Create your first team placeholder carrying the same Add team control.
The wizard opens in a panel beside the Teams page and runs in three steps: Identity, Members, and Review. The step counter and the Continue control sit in the panel footer, and each completed step is marked along the top. Cancel on the first step and Back on later steps leave or reverse the flow. Once anything has been entered the footer warns that closing the panel discards the progress, so the wizard is completed in one pass.
Step 2: name the team
- Enter a Name. The name identifies the team in user listings and in Analytics, so a name matching the organizational unit that owns the spend, such as
Platform Engineering, carries more meaning at reporting time than an internal abbreviation. - Optionally enter a Description recording what the team is for. It is shown to administrators reviewing the team later and has no functional effect.
- Select Continue.
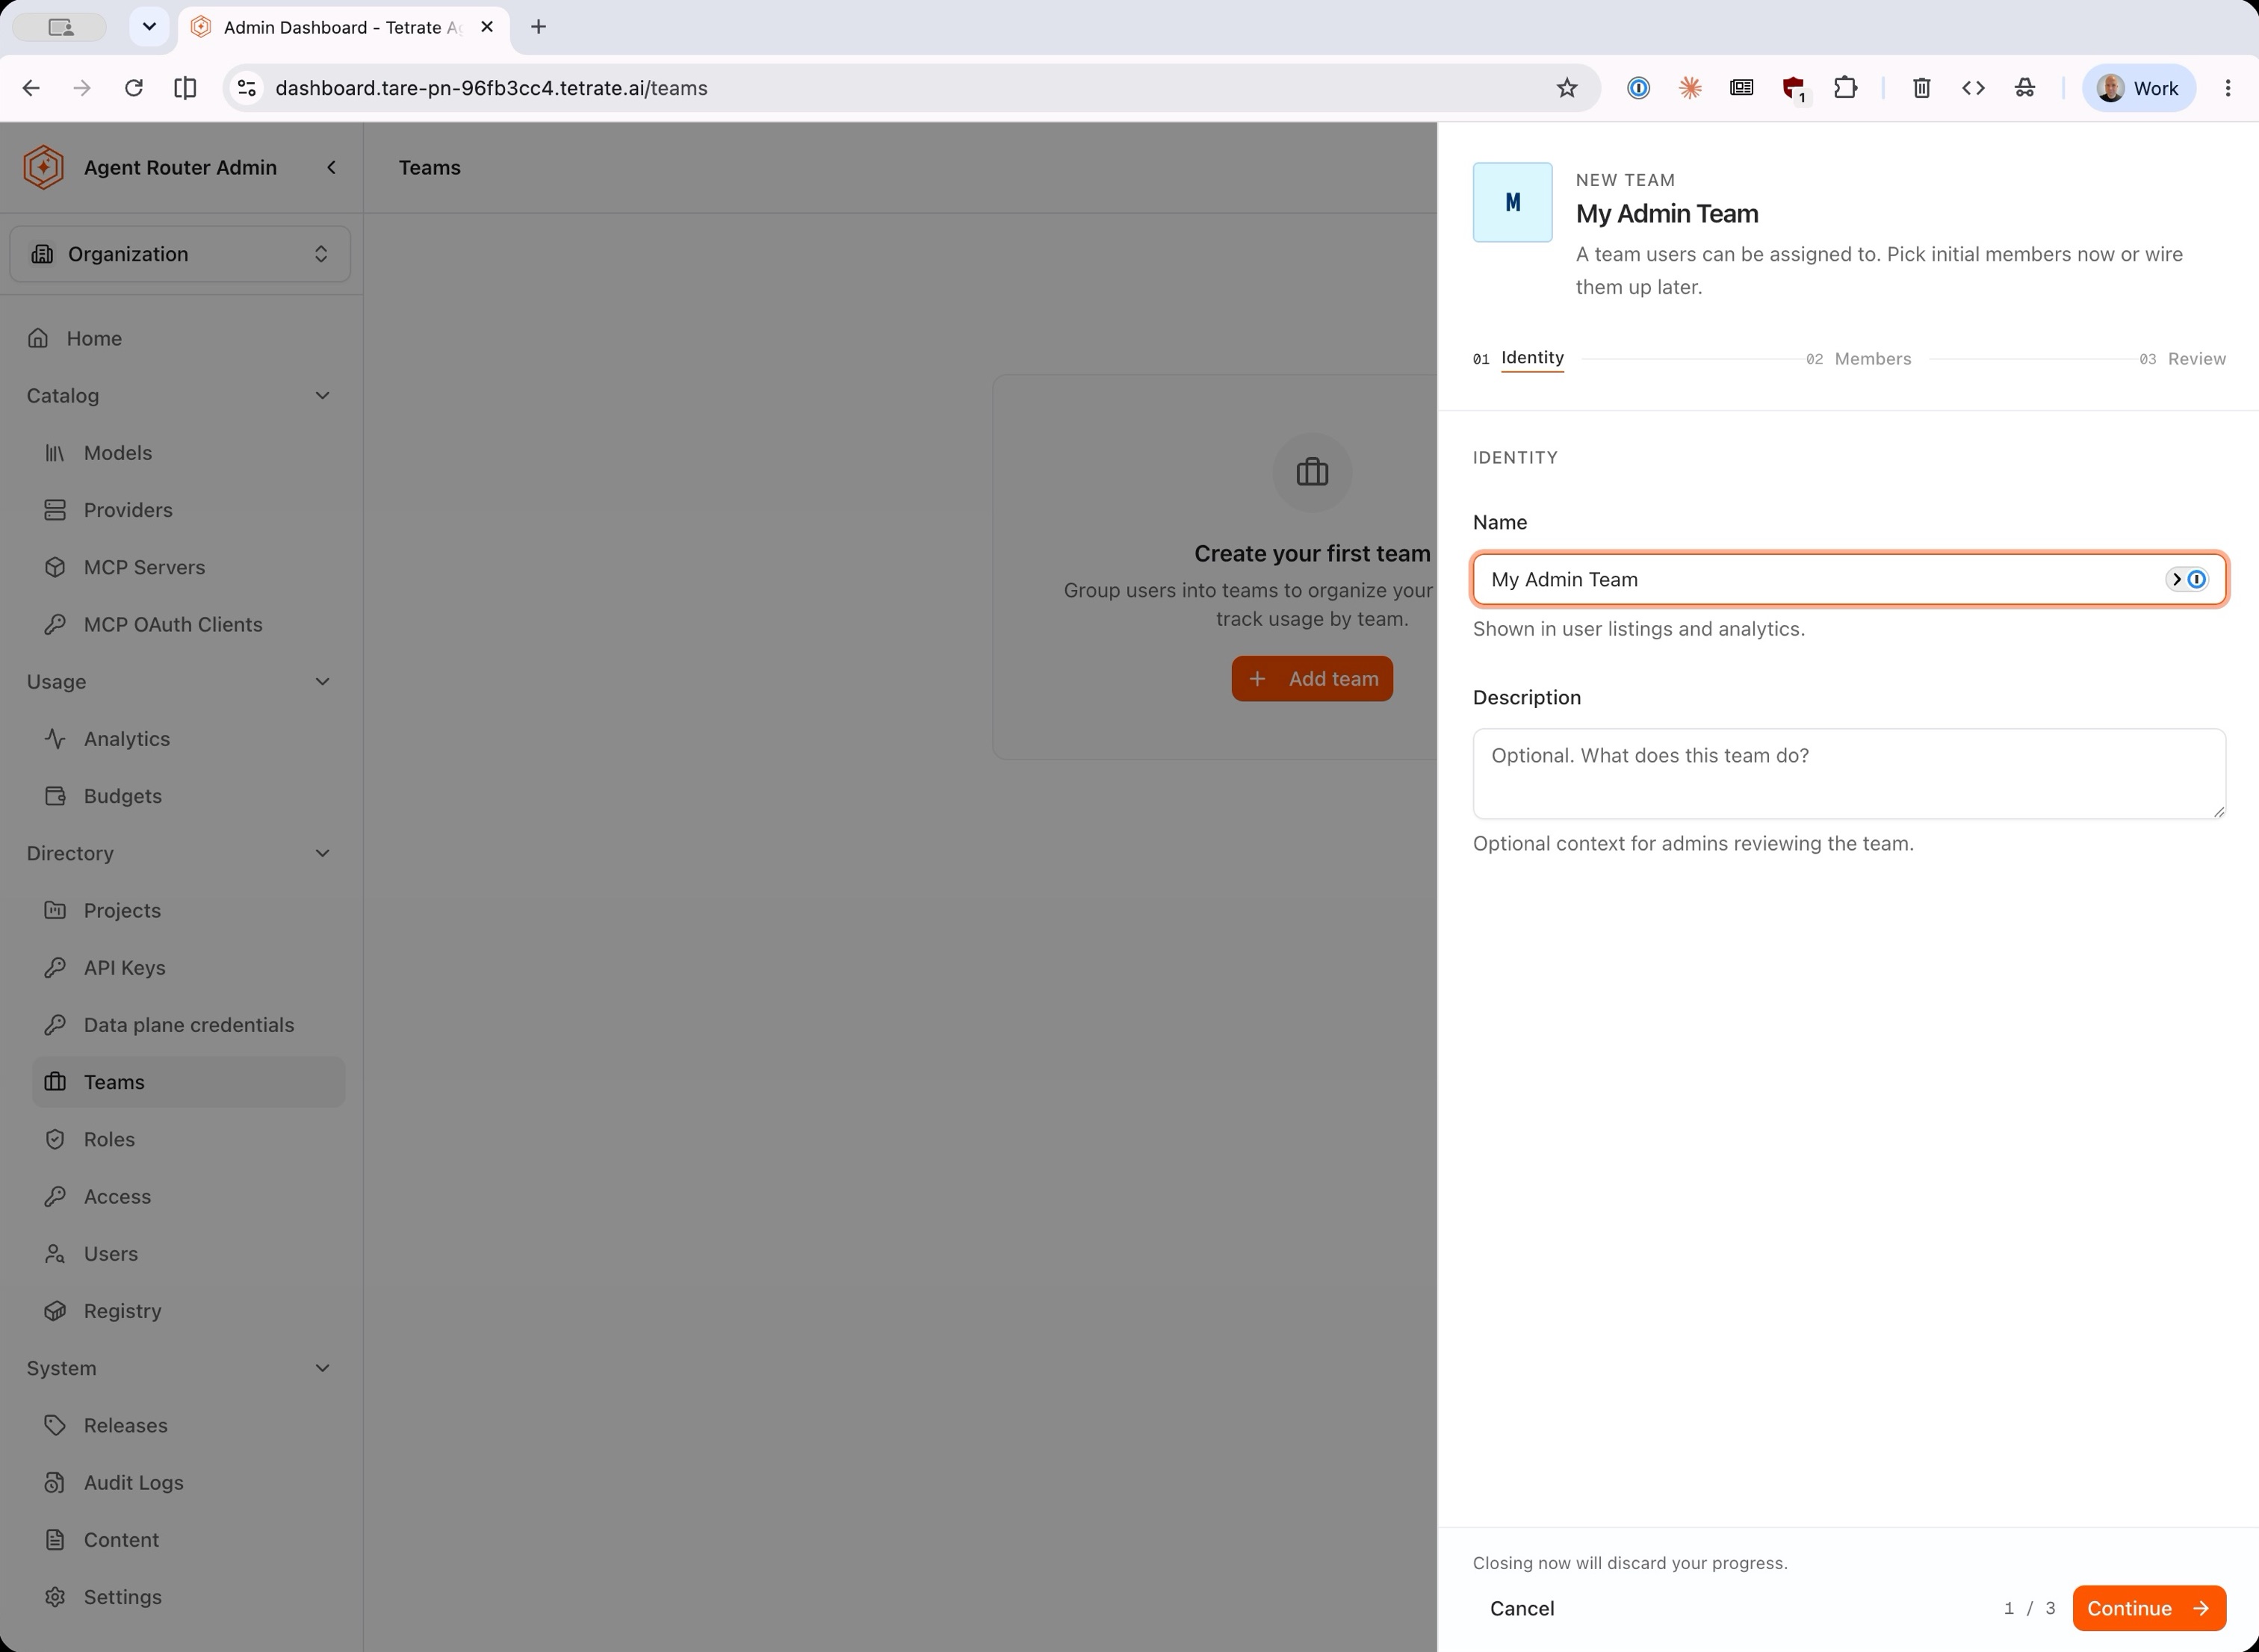
The name is the only required value in the wizard: Continue stays disabled until it is filled. The panel header previews the name as it is typed, which is the quickest check that the value is the one intended.
Step 3: select the members
- Select the users who should belong to the team. Each row carries a checkbox, the person's name, and their email address, and the counter above the list reports how many are selected.
- For a long directory, narrow the list using Search users by name or email, or jump to a surname using the alphabetical index down the right edge.
- Select Continue.
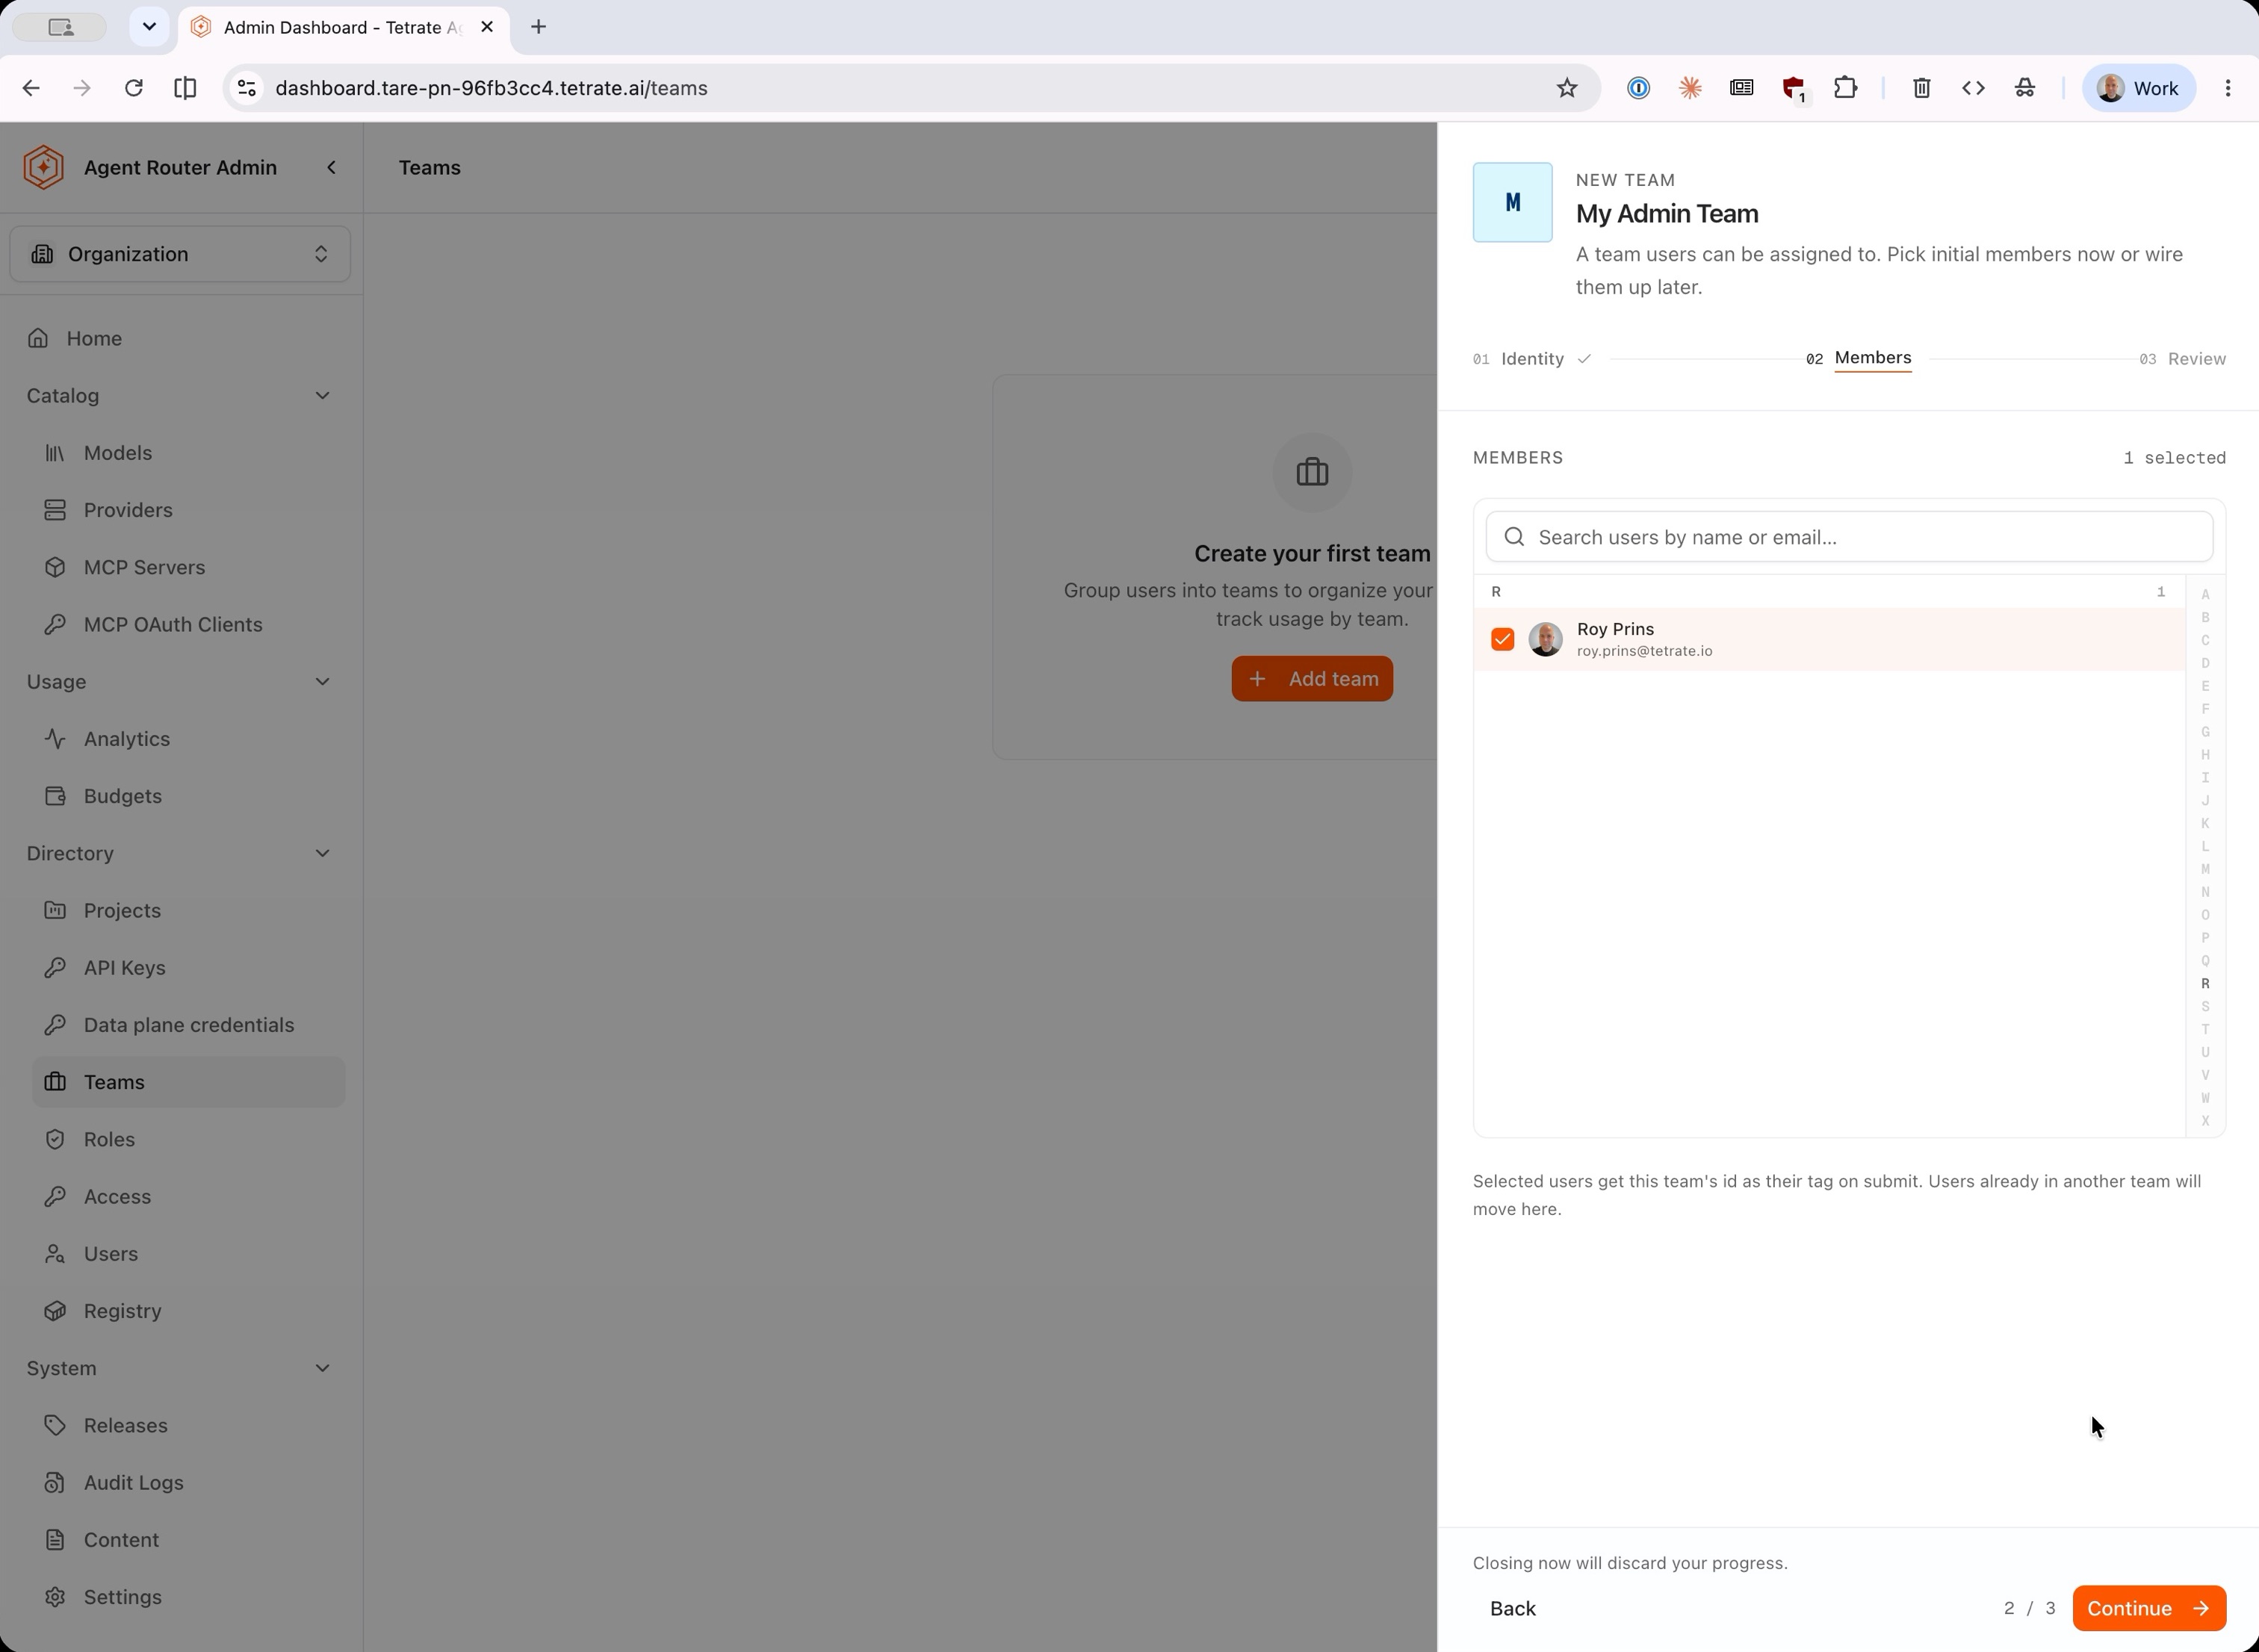
This step is optional. A team can be created empty and populated afterward, which is the sensible order where the team is being created ahead of the people who will join it.
Nothing is applied to the selected users at this point. Membership is written only when the wizard is submitted in the next step, so a selection made here can still be reversed without consequence.
Step 4: review and create
- Check the summary. It restates the name and description, the number of members the team will hold, and the number of moves, meaning how many of those users are being taken out of another team.
- Remove anyone selected in error using the × beside their name under Initial members.
If creation fails
Team creation has two failure shapes, and they are told apart by what the error says:
- A permission refusal means the signed-in role cannot manage users and teams; creation needs Super Admin or User Admin (or an equivalent grant), as listed under Prerequisites.
- A server error is not a configuration problem on the operator's side: nothing about a team's name or member list can cause one. Retry once, and if it persists, raise it with support with the time of the attempt; the attempt and its actor are visible in the audit log, which is the reference to include.
- Select Create team.
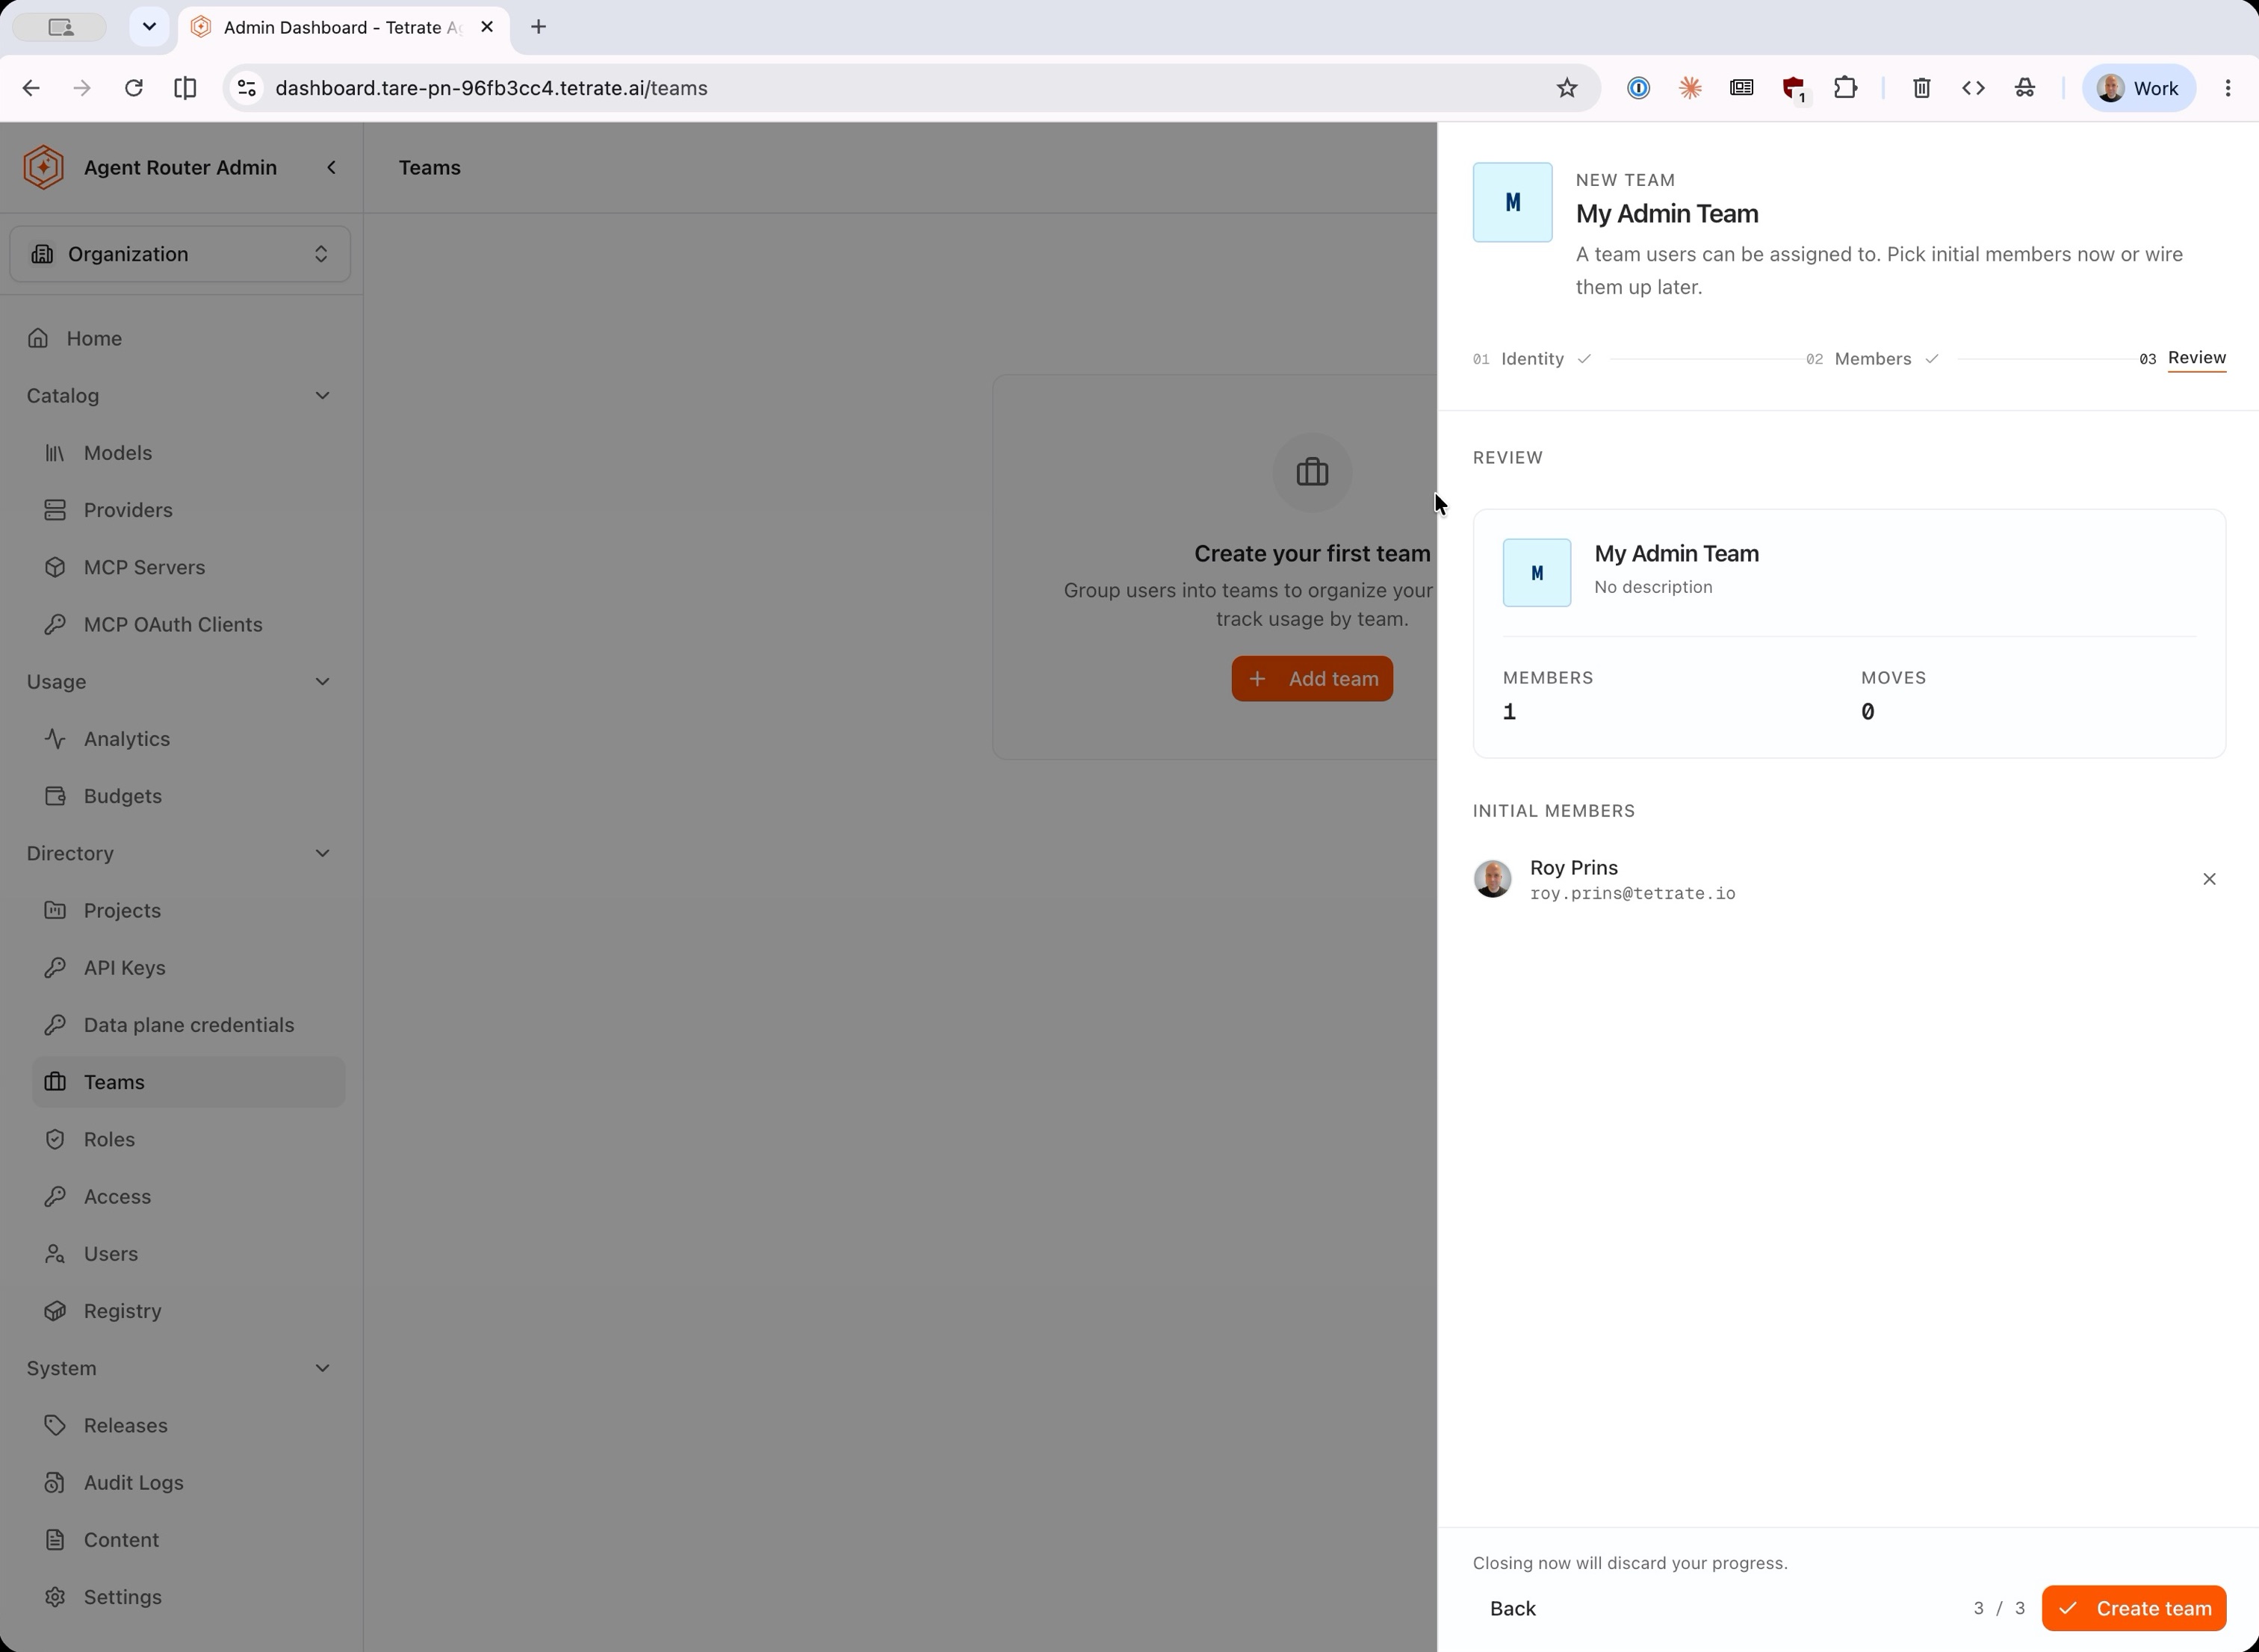
The moves count is the figure worth reading closely. A move is not additive: it removes the person from the team they were in, along with any access that team conferred. Where the count is higher than expected, the cause is usually a name selected from the directory without noticing an existing membership, and the × control resolves it before submission rather than after.
A user belongs to one team at a time
Membership is recorded on the user as a tag carrying the team's identifier, and a user carries one such tag. Three consequences follow:
- Selecting a user who already belongs to another team moves them into the new team rather than giving them a second membership. The Review step counts these separately so that the reassignment is visible before it is applied.
- Reassignment is therefore performed by selecting the person into the destination team. Removing them from their current team first is neither necessary nor sufficient.
- Access inherited from the previous team ends at the same moment. Where a role had been granted to that team, the person loses it on the move, and where a role has been granted to the destination team, they gain it. The rules governing inherited access are in Manage roles and permissions.
Because membership is exclusive, a team is best modeled on the unit a person genuinely belongs to, typically the one that owns their budget, rather than on a working group they participate in temporarily. Cross-cutting access is expressed with a role granted directly to the person, which coexists with their team membership.
Putting the team to use
A team on its own changes nothing. It takes effect when it is named somewhere:
- To give the whole team the same Admin Console access, grant a role to the team on Directory → Access. Adding someone to the team then grants that access, and moving them out withdraws it. See Manage roles and permissions.
- To give the team access to a project, select the team in the Members step of the Create Project wizard. The team's members at that moment are added individually, so people who join the team later are not added to the project retrospectively. See Create and delete a project.
- To report on the team's spend, apply the Team filter in Analytics. See Compare user and team spend in Analytics and, for chargeback, Split the AI bill across teams.
Manage teams through the API
Since 0.5.0, everything the wizard does is also a management-plane API call: teams are the user-group calls on the policy service, from CreateUserGroup through DeleteUserGroup. See the Management API reference for the calls and their fields. Three behaviors surprise API callers and are worth knowing before building against them:
- Member details are visibility-gated. A member's email, avatar, and ban flag come back only to credentials holding
users_reader, and only for members inside the caller's directory boundary. Every other caller sees ids and names. A response with bare ids is the visibility rule at work, not a data gap. - Moving a user is one call, and the response says what happened. Adding a user to a team removes them from their previous team in the same Organization, matching the one-team rule above, and the response names the team they left, so an automation can log or veto the move.
- Deleting a team is refused while it has members or active policies. Remove the members and deactivate the policies first; since 0.5.0 the call refuses rather than ignoring them.
Operational notes
- The name is shown in user listings and in Analytics, so renaming a team changes how historical usage is labeled in reports. Agreeing the naming scheme with whoever consumes the cost reports before the first team is created avoids relabeling later.
- A team confers nothing until it has members, and a role granted to an empty team has no effect at all.
- Administrative changes are recorded and can be reviewed under Audit Logs, as described in Audit Agent Router activity.
- Teams group users for access and reporting. They are not an isolation boundary: the boundary for models, keys, MCP servers, and policy is the project.
Where to go next